Your Cart is Empty


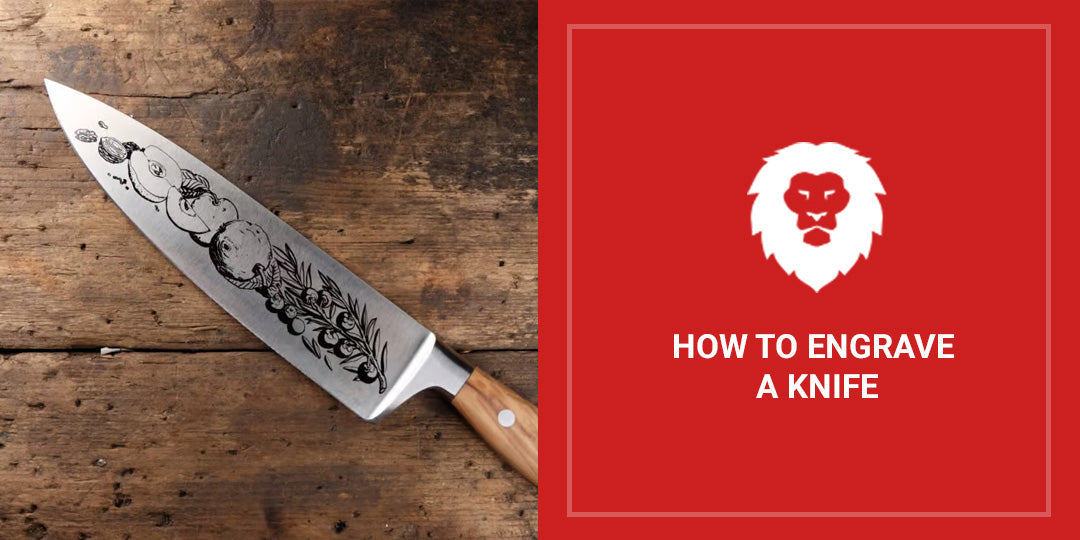
How To Engrave A Knife

Quick Summary
Engraving a knife involves cutting a permanent design (such as initials, logos, or decorative elements) into the blade or handle for personal, practical, or branding purposes. Common methods include hand engraving, rotary tools, laser engraving, and electro-etching, each offering different levels of control and access. Before starting, it’s important to prep the blade by cleaning and sanding the surface to prevent skipped lines and tool drag. Transferring your design with a stencil or marker, securing the knife, and using steady pressure during engraving all contribute to a cleaner result. After engraving, inspect and refine the design, then sand and polish the surrounding area to improve contrast. Applying a protective oil helps preserve the engraved surface afterward.
Engraving is an art form that’s been around for centuries. In the beginning, people inscribed elaborate designs on items like knife blades to honor their rulers or gods. Then, Hittite carvers started engraving jewelry and other personal items for the wealthy. Today, we use it to make something more ornate or signify ownership, which is commonly seen in heirloom jewelry.
Knife makers have embraced engraving because it lets them personalize the blade, customize it as a gift, or simply mark their work. In this full guide, we’ll outline how to engrave a knife using hand tools or rotary equipment. We’ll also explain how sanding improves engraving quality by smoothing out imperfections. If you’re ready to begin a project, these steps can help you achieve excellent results.
What Is Knife Engraving?
Knife engraving is the process of cutting or carving a permanent design into the surface of a blade or handle. It's commonly used to personalize knives with initials, logos, or symbols, but it also serves practical purposes like identification or serial marking. Some makers engrave their branding on custom blades, while others use it to turn a tool into a meaningful keepsake.
The engraving itself can be shallow or deep, depending on the tool and technique used. It might cover just a small part of the blade or extend across the full surface. While some engravings are purely decorative, others serve a more practical role. Makers might add a serial number, production code, or brand mark to help track knives or verify authenticity. These inscriptions are useful for record-keeping, sales, or warranty claims, especially for those who produce custom blades.
Common Knife Engraving Methods
There’s more than one way to engrave a knife. Some techniques work well for beginners using hand tools at home, while others require access to equipment that supports greater speed or accuracy. Each method affects the appearance and permanence of the finished design.
- Hand Engraving:Hand engraving involves cutting the metal with a sharpened tool called a graver. This method is slower than others and requires a steady hand, but it gives you full control over the depth and direction of each line. It’s commonly used by experienced knife makers who value hands-on craftsmanship and are comfortable working without powered tools.
- Rotary Tool Engraving:Rotary engraving is one of the most accessible options for engraving. Using a handheld rotary tool and a carbide or diamond bit, you can carve designs directly into the blade. This method is flexible, affordable, and well-suited for everything from initials to full designs, especially when the blade has been sanded smooth in advance.
- Laser Engraving:Laser engraving is fast and precise, but you need special equipment. It’s commonly used by businesses or shops that engrave large numbers of blades or need a clean, uniform result. This technique is ideal for logos or intricate patterns, but usually needs to be outsourced unless you have access to a laser machine.
- Electro-Etching:Electro-etching uses an electric current and a saltwater or acid solution to transfer a design onto the metal. It’s normally used by knife makers who want to add a clean mark (like a maker’s logo) without cutting deeply into the steel. This method requires a stencil, a power source, and basic safety gear.
What You Need Before You Start
Before you begin engraving, you’ll want to gather the necessary tools and prepare your workspace. Engraving metal creates dust, heat, and vibration, so safety and surface prep are both critical. Having everything ready ahead of time will also help you work more efficiently and avoid damaging your blade.
- Safety Gear:Start with basic protective equipment. Wear safety glasses to protect your eyes from metal dust or flying debris, and use a dust mask or respirator if you're sanding or engraving for long periods. Gloves can help protect your hands while touching the blade, but they should never be worn while using rotary tools, as they can catch in the bit.
- Tools and Supplies:You’ll need a knife or blank to engrave, along with either hand tools (like a graver) or a rotary tool with engraving bits. Rotary engravers work best with carbide or diamond-coated tips. A clamp or vise keeps the blade steady while you work, and a marker or stencil helps guide your design.
Step-By-Step: How To Engrave A Knife
Engraving a knife takes care, patience, and a well-prepared surface. The steps below outline each stage of the engraving process, from choosing your design and preparing the blade to engraving the metal and cleaning up the final result. Whether you're using a rotary tool or working by hand, a clean setup and steady approach will make your results sharper and easier to read.
Step 1: Choose or Create Your Design
Start by deciding what type of design you want to engrave. Basic elements like initials, short words, or simple symbols are easier to manage, especially if you're new to engraving. More detailed artwork or logos require more careful planning, as small mistakes are harder to correct once you've started cutting.
You can sketch the design by hand or use digital software to create a printable stencil. Printed designs can be transferred using carbon paper or adhesive vinyl, depending on your method. If you’re engraving for branding or identification, keep the layout tight and readable so the mark remains clear even at a small size.
For decorative engraving, take time to match the scale and shape of the design to the surface of the knife. Oversized or poorly placed markings can look unbalanced. If you're unsure about the placement, practice drawing the layout on paper or a scrap piece of metal before working on the blade itself.
Step 2: Clean and Prepare the Blade
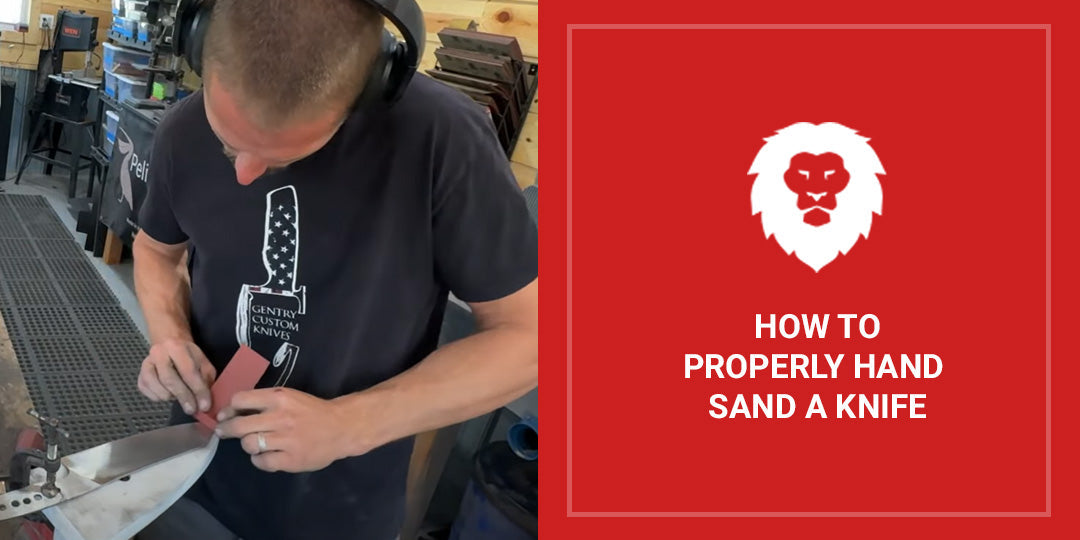
Use rubbing alcohol, acetone, or a degreaser to remove oils, dirt, or any leftover residue from sharpening or handling. After cleaning, sand the blade with sheets or belts, starting with a medium grit like 120 to remove minor imperfections or coating. Gradually move up through finer grits (220, 320, and then 400 or higher) to create a clear, even surface.
This step helps your engraving tool move more easily and prevents skipped lines. A rough or uneven surface, on the other hand, can cause the tool to chatter or leave jagged marks. Red Label Abrasives manufactures industrial-quality aluminum oxide and silicon carbide abrasives that work well on stainless steel and carbon steel blades, so if you need to stock up, we can help.
Step 3: Transfer the Design
Once the blade is clean and sanded smooth, transfer your design using a fine-tip marker, scribe, or pre-cut stencil. If you want better visibility while engraving, coat the surface with layout fluid or dark ink before marking your lines. The contrast between the dark background and the lighter markings makes it easier to follow the design as you cut. Take your time placing the stencil or drawing freehand, and double-check the position to make sure it’s straight and evenly spaced before you begin engraving.
Make sure the blade is completely dry before applying a stencil or drawing your design. Any moisture or leftover residue can cause the stencil to lift or smear, which affects the accuracy of your engraving. If you're using a rotary tool, leave enough space between your design and the blade’s edge: placing the lines too close to the edge increases the chance of the bit slipping, especially on curved or tapered sections. Keeping a safe margin also helps you maintain steady pressure as you guide the tool along the lines.
Step 4: Secure the Knife
Place the knife in a secure clamp, vise, or on a non-slip mat to keep it from shifting while you work. Even slight movement during engraving can throw off your lines, create scratches, or lead to uneven depth. If you're working on the handle instead of the blade, add a soft barrier like felt, leather, or rubber between the clamp and the material. This prevents dents or scuff marks, especially on wood, bone, or composite handles that can be easily damaged by direct pressure.
Position the knife so you can work at a stable, comfortable angle without leaning or overreaching. The vise or clamp should hold the blade firmly, but you should still be able to move your tool freely across the surface. Proper lighting is just as important: use a focused task light or LED lamp to reduce shadows and make the markings easier to follow. You need to see the tip of the tool clearly at all times, including how deep it’s cutting and how close it is to the edges of your design.
Step 5: Begin Engraving
Begin with light pressure and short, controlled strokes, especially if you haven’t used the tool before. Forcing the bit or graver into the metal can lead to slips or uneven lines. Let the cutting edge do the work while you guide it steadily along the marked path. If you're using a rotary tool, start with a low or medium speed to maintain control and avoid overheating the metal.
Work in small sections rather than trying to engrave the full design all at once. Stop regularly to check your progress and clean away dust so you can see your lines clearly. If possible, use both hands: one to hold the tool and the other to stabilize it near the tip. This adds control and reduces shaking. If the blade starts to feel warm, pause and allow it to cool before continuing to avoid warping or dulling the engraving bit.
Step 6: Inspect and Refine
Once you’ve finished engraving, inspect the blade under good lighting. Check the lines for consistent depth and smoothness, and look for any sections where the tool may have skipped or dragged. If needed, you can carefully retrace parts of the design to sharpen edges or deepen shallow areas, but move slowly to avoid widening the lines too much.
Clean the blade with a soft cloth to remove dust or metal shavings, and then evaluate how well the design stands out against the surface. If it appears faint or hard to read, use fine-grit sanding sheets to gently smooth the area around the engraving. This helps create contrast by polishing the background while keeping the engraved lines intact.
How to Apply Finishing Touches to the Engraving
Sanding, polishing, and applying a protective layer can help your engraved design stand out while preventing corrosion or surface wear. These steps are especially important for knives intended for regular use, such as kitchen or hunting knives.
Sanding and Polishing
Once you’ve cleaned the blade, use a fine-grit sanding sheet (typically 800 grit or higher) to smooth out the areas around the engraving. This helps remove any remaining marks or rough edges left behind during the cutting. Work carefully to avoid sanding inside the engraved lines, as doing so can reduce their contrast or blur the detail.
To bring out the shine of the metal and enhance the engraved pattern, follow up with a polishing compound and a felt wheel or soft cloth. A light polish creates a clean finish without softening the edges of your engraving.
Protecting the Blade
Once the engraving is polished, apply a thin coat of oil or corrosion inhibitor to protect the blade from moisture. This is strongly recommended for high-carbon steels that are more prone to rust. Then store the knife in a dry place and check the blade periodically to make sure the engraved area stays clean and sharp.
Creative Ideas for Knife Engraving
Below are common engraving ideas used by knife makers, hobbyists, and collectors:
- Initials or Names: These options are classic choices for personal or commemorative knives. They’re usually placed near the base of the blade or on the handle to keep the design clean and readable.
- Dates or Coordinates: You can engrave a meaningful date, such as a birthday, anniversary, or retirement. Geographic coordinates work well for marking a location tied to a memory or event.
- Short Phrases or Mottos:Personal sayings, mottos, or one-word engravings can reflect values or intentions. They’re especially effective when placed along the spine or flat of the blade.
- Symbols or Decorative Elements:Shapes like arrows, leaves, or animals can add visual interest without overwhelming the design. They work best when they follow the natural lines of the blade.
- Maker’s Mark or Logo:If you create and sell custom knives, engraving your maker’s mark helps establish consistency and recognition. Many artisans place the logo near the handle or ricasso for visibility.
- Pattern Work:Repeating designs, such as borders or flourishes, can frame the engraving or accent certain features of the knife. They are often used on larger blades where there’s more room to work.
Perfect Your Knives With Premium Abrasives
Engraving a knife takes time and skill, but the results are worth it. Whether you’re engraving initials, adding a maker’s mark, or creating something more decorative, preparation is just as important as technique.
At Red Label Abrasives, we carry sanding belts, sanding sheets, and polishing supplies that can help you achieve better results at every stage in the production process. For more information or to place an order, please call 844-824-1956 or fill out our contact form, and we’ll be in touch.


Belt Packs Made For Knife Makers

2 X 72 Inch Knife Makers Sanding Belts Assortment

2 X 60 Inch Knife Makers Sanding Belts Assortment

2 X 48 Inch Knife Makers Sanding Belts Assortment

2 X 36 Inch Knife Makers Sanding Belt Assortment

2 X 42 Inch Knife Makers Sanding Belts Assortment

1 X 30 Inch Knife Makers Sanding Belts Assortment

1 x 42 Inch Knife Makers Sanding Belt Assortment
Shop By Product Category


Why Choose Red Label?

