Your Cart is Empty


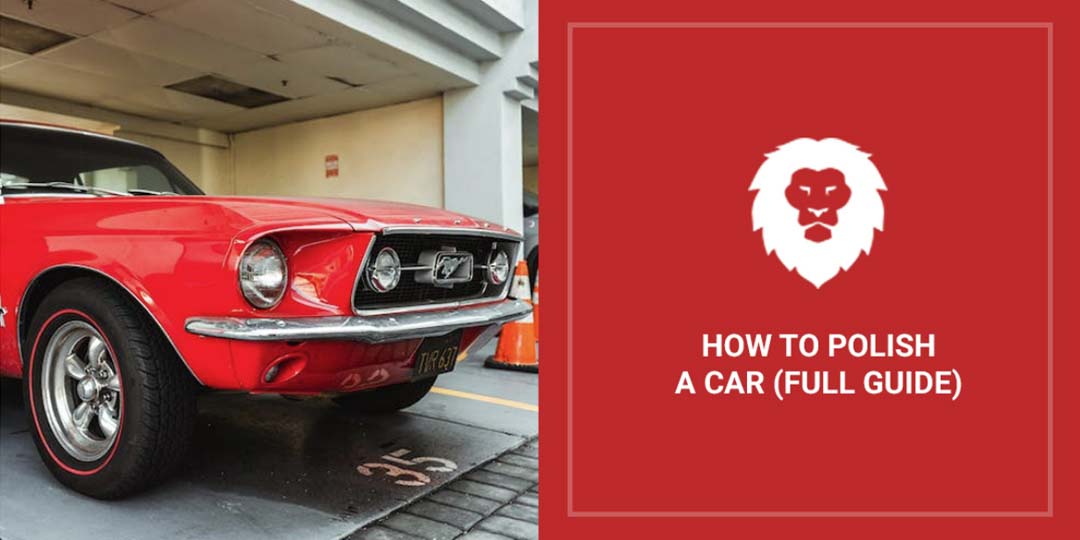
How To Polish A Car: The Full Guide

Quick Summary
Polishing a car is a multi-step process that involves preparing the vehicle, choosing the right polish for different types of paint, and using either a dual-action polisher or hand application. Finishing touches, such as removing residue and excess polish, applying a protective wax or sealant, buffing and polishing windows and mirrors, and cleaning and dressing the tires are also key steps for maintaining the car's shine.
Remember how flawless your car first looked when you drove it away from the dealership? Over time, all that luster and shine gives way to swirl marks and scratches, some of them bigger and deeper than others. Even the vibrancy of the paint job disappears, especially when hard water spots start dotting the surface.
Fortunately, restoring your ride to its former glory isn’t as hard as you might think. In this full guide, the team at Red Label Abrasives outlines how to polish a car and make it look as sleek and shiny as the day you bought it.
Understanding the Basics of Car Polishing
Polishing removes imperfections from the car's paint, such as swirl marks, scratches, oxidation, and light etching. This process aims to restore the paint's shine and clarity. In this respect, polishing is different from waxing, which applies a protective layer on the paint to safeguard it from the elements.
Car polishes come in various formulations, each serving a specific purpose. Understanding these types will help you choose the right polish for your car's paint:
- Abrasive Polishes:These polishes contain tiny abrasive particles that effectively remove surface imperfections. Mild polishes are suitable for regular maintenance and removing light swirl marks, while heavy-cut polishes are ideal for correcting deep scratches and heavy oxidation.
- All-in-One Polishes: All-in-one polishes combine the functions of both polish and wax in a single product. They provide moderate correction of imperfections and leave a protective layer on the paint surface. All-in-one polishes are convenient for routine maintenance and light correction.
- Finishing Polishes: Finishing polishes are designed to refine the paint's finish after using more aggressive polishes. They have fewer abrasive particles and are primarily used to eliminate fine scratches, haze, and any remaining imperfections. Finishing polishes enhance gloss and prepare the surface for wax or sealant application.
- Swirl Removers: These products are specifically formulated to tackle swirl marks, which are circular or spider-web-like light scratches that often result from improper washing or drying techniques. They are mild abrasives that gently remove swirl marks and restore the paint's clarity.
Steps Involved in Choosing the Right Polish for Your Car's Paint
Selecting the appropriate polish for your car's paint requires careful consideration. The following steps can help you make an informed decision:
- Examine your car's paint for imperfections such as swirl marks, scratches, oxidation, or dullness. Determine the severity and type of imperfections you need to address.
- Identify the type of paint on your car, such as single-stage, clear coat, or metallic. Different paint types may require specific polishes or techniques to achieve optimal results.
- Depending on the severity of imperfections, choose a polish with an appropriate level of abrasiveness. Milder polishes are suitable for light correction, while more aggressive ones are necessary for deeper scratches or heavy oxidation.
Before applying polish to the entire car, perform a test spot on a small, inconspicuous area to assess the polish's effectiveness and compatibility with your paint. If the results look good, you can proceed. If not, try a different product and keep experimenting until you get the desired effect.
Preparing Your Car for Polishing
Gather all the necessary tools and materials before you begin car polishing. Here's a checklist of items you will need:
- Car wash solution or automotive shampoo
- Buckets (at least two)
- Grit guard (to prevent dirt from contaminating wash mitts)
- Automotive wet sanding discs
- Microfiber wash mitts or sponges
- Soft bristle brushes (for wheel cleaning)
- Drying towels (preferably microfiber)
- Clay bar or detailing clay
- Clay lubricant or quick detailer
- Paint correction products (polish, compound, or scratch remover, if needed)
- Dual-action polisher (if using machine polishing)
- Polishing pads or applicator pads
- Microfiber towels or polishing cloths
- Paint sealant or wax (optional, for a finishing touch)
Once you’ve assembled everything you need, start by rinsing the car's surface with water to remove loose dirt and debris. Fill one bucket with clean water and another with the car wash solution or automotive shampoo mixed with water according to the product instructions. Then start washing the car from top to bottom, section by section, using a microfiber wash mitt or sponge dipped in the soapy water. Be sure to rinse the wash mitt in the clean water bucket after each section to remove dirt and avoid reintroducing it to the car's surface.
As you work, pay extra attention to areas prone to dirt accumulation, such as lower panels, wheel wells, and behind the wheels, and use soft bristle brushes to clean the wheels, tires, and any intricate or hard-to-reach areas. Once you’re done, rinse the car thoroughly with clean water, ensuring all soap residue is removed. To prevent water spots, dry the car using soft, lint-free microfiber towels. Start from the top and work your way down, gently patting and wiping the surface.
Sanding Surface Imperfections
Before proceeding with the actual polishing, it's essential to address any scratches or imperfections that require attention. Inspect the paint surface under good lighting conditions for scratches, swirl marks, or other visible imperfections.
You’ll remove these imperfections by sanding the metal surface with an orbital sander using automotive wet sanding discs. Sanding discs come in a variety of grits. For auto body detailing work, you’ll typically stick to a grit range between 1500 and 3000.
Before you start sanding, spray the surface with water. The water will act as a lubricant to provide a smoother surface finish. Once the surface has been coated in water you can begin sanding. The grit you start with will depend on the depth of the marks, but you’ll likely be able to start with 2000 grit.
After one round of sanding with 2000 grit, you’ll repeat the process with 2500 and 3000 grit. After the three rounds of sanding, the surface of your car should be ready for polishing.
Step-by-Step Guide to Polishing a Car
Once you’re ready to start the actual polishing, park your car in a shaded or covered area to prevent direct sunlight during the polishing process. Remove any objects or obstacles near the car that may hinder your movement or potentially get damaged during polishing. Then place plastic or fabric drop cloths over adjacent surfaces, such as trim, rubber seals, or windows, to protect them from accidental polish splatter.
Apply Masking Tape to Protect Vulnerable Areas
Identify vulnerable areas that may be damaged by polish residues, such as emblems, badges, plastic trim, or rubber seals. Carefully apply automotive masking tape to these areas, creating a protective barrier between the polish and the vulnerable surfaces.
Start with a Test Spot
Test a small, inconspicuous area of your car's paint surface by applying a small amount of polish to an applicator pad or microfiber towel and working it into the paint using circular or back-and-forth motions. Assess the test spot after polishing to evaluate the level of correction and adjust the technique or product if necessary.
Polishing Techniques for Different Types of Paint
The polishing technique you will use depends mainly on the paint type. Below is an overview of common paints and the best approach for each one.
- Single-Stage Paint:Use a mild to medium-cut polish appropriate for single-stage paint. After applying it to the pad or towel, work it into the paint using moderate pressure. Polish in small sections, overlapping each pass to ensure even coverage.
- Clear Coat Paint: Use a medium to heavy-cut polish suitable for clear coat finishes, which are common in modern cars. Apply the polish to the pad or towel and work it into the paint using moderate pressure. Overlap passes for even coverage.
- Metallic Paint: Metallic paints require special care, so use a gentle polish designed for these finishes. Apply the polish to the pad or towel and work it into the paint using light pressure. Give the surface you're polishing periodic breaks to prevent excessive heat buildup.
Using A Dual-Action Polisher
If you’re using a dual-action polisher, attach the appropriate pad to the polisher, following the manufacturer's instructions. Then apply a small amount of polish to the pad and spread it onto the paint surface before turning on the machine. Start the polisher at a low-speed setting and gradually increase it as you work. Keep it moving in a steady and overlapping pattern to prevent heat buildup and ensure even polishing.
Using A Standard Orbit Polishing Machine (Orbital Buffer)
These machines serve as a convenient alternative to hand polishing. They feature rotating pads that move in a circular motion, similar to the motion used when hand polishing.
While these machines are safe and user-friendly, they have limited cutting power. While it may be possible to address some surface defects with them, they do not provide significant polishing capabilities beyond what can be achieved by hand. However, using these pads is considerably easier and less tiring than manual polishing.
Using An Angle Grinder
You can use an angle grinder for auto polishing work as long as your angle grinder has variable speed capabilities. The grinder needs to be able to run under 3000rpm to avoid damaging the surface of the car.
You can use an airway buffing wheel with your angle grinder to perform the polishing work. We recommend starting with our green wheel for auto body work and then finishing with our white wheel. You will also need safety flanges to use airway buffing wheels if you don’t have them already.
Using A Random Orbit Polishing Machine
Random orbit polishing machines have pads equipped with a bearing that enables them to freely spin on their own axis. The pad rotates in a random pattern, resulting in a varied application across the surface.
These buffing machines provide effective cutting power to polish surfaces and eliminate imperfections. They are particularly recommended for beginners, as they offer an excellent balance of high performance and user-friendliness.
Polishing By Hand
If you’re polishing by hand, apply a small amount of polish to an applicator pad or microfiber towel and work it into the paint using circular or back-and-forth motions, applying even pressure. Continue until the desired level of correction is achieved.
Pro Tip: Divide the car's surface into manageable sections, such as panels or body lines. Apply the polish to each section and work it in using the chosen technique (machine or hand application). Maintain an even pressure on the pad or towel while polishing to ensure consistent results.
Dealing with Stubborn Scratches or Swirl Marks
For stubborn scratches or deeper imperfections, consider using a more aggressive polish or compound. Apply the product to an appropriate pad or towel and focus on the affected area using controlled and precise movements. Gradually refine the area using less aggressive polishes until it blends seamlessly with the surrounding paint.
Finishing Touches
After you’re done polishing, you’ll want to remove any residue and excess polish from the car's surface. Follow these steps:
- Use clean, soft microfiber towels to gently wipe off any remaining polish residue.
- Pay attention to crevices, seams, and other hard-to-reach areas where polish may accumulate.
- Check for streaks or smudges and buff them out with a clean microfiber towel.
- Ensure that the surface is clean and free from any leftover polish before proceeding to the next step.
To enhance the shine and protect the polished surface, applying a layer of wax or sealant is recommended.
- Choose a high-quality automotive wax or sealant suitable for your car's paint type.
- Apply a small amount of wax or sealant onto an applicator pad or microfiber towel.
- Work the product into the paint using circular motions, ensuring even coverage.
- Let the wax or sealant dry according to the product instructions.
- Once dry, use a clean microfiber towel to buff off the wax residue, revealing a glossy finish.
- Repeat the process for the entire car's surface, working in manageable sections.
Buffing and Polishing the Windows and Mirrors
In order to complete the polished look, attention should also be paid to the windows and mirrors.
- Clean the windows and mirrors using a glass cleaner and lint-free microfiber towels. If there are any water spots or streaks, use a glass polish or vinegar-water solution to remove them.
- Apply a small amount of glass polish to a clean microfiber towel and work it into the glass using circular motions. Buff off the residue using a separate clean microfiber towel until the glass is clear and streak-free.
- Repeat the process for all windows and mirrors, ensuring thorough cleaning and polishing.
Cleaning and Dressing the Tires
Don’t forget the tires!
- Rinse the tires with water to remove loose dirt and debris.
- Apply a dedicated tire cleaner or an all-purpose cleaner diluted with water.
- Scrub the tires using a soft-bristle brush or sponge to remove stubborn dirt and grime.
- Rinse off the cleaner thoroughly with water.
Optionally, apply a tire dressing or protectant to give the tires a glossy finish and protect them from UV rays. Use an applicator pad or sponge to evenly apply it, following the product instructions. Allow the dressing to dry completely before driving the car.
Maintaining a Polished Car
After polishing your car, it's essential to adopt a regular maintenance routine to preserve its shine. Recommended steps include:
- Washing your car regularly to remove dirt, dust, and environmental contaminants that can dull the shine. Use a high-quality automotive shampoo and a microfiber wash mitt or sponge for a gentle yet effective cleaning. After washing, ensure thorough drying using clean, soft microfiber towels. This prevents water spots and minimizes the risk of dirt clinging to the wet surface.
- Avoiding automatic car washes, which can be abrasive and may cause scratches or swirl marks. Whenever possible, opt for hand washing or touchless car washes.
- Using a microfiber duster to maintain the shine of the car between washes. This minimizes the risk of scratches and preserves the polished finish.
- Applying a protective wax or sealant regularly to maintain a barrier against environmental factors. This not only enhances the shine but also provides additional protection to the paint.
- Using car care products that are specifically formulated for automotive use. Avoid using harsh chemicals or household cleaners, as they can damage the paint and compromise the shine.
A Cut Above the Rest For Abrasive Products
By following these step-by-step instructions, you can effectively polish your car and restore its paint's shine and clarity. Remember to work carefully, be patient, and make adjustments as necessary to achieve the best results.
For over 35 years, Red Label Abrasives has been a leading producer of high-quality industrial-grade sanding products. We offer many different abrasive products for auto body work, including auto sanding discs, airway buffing wheels, and hand sanding sheets. We strive to produce our abrasive products at affordable prices, delivering exceptional value. Alongside our unrivaled product quality, we provide unmatched customer service and support, including a 100% money-back guarantee. If you have questions or would like to place an order, call 844-824-1956 or fill out our contact form today!
Other Blog Posts You May Be Interested In


Our Most Popular Abrasives

EdgeCore Ceramic Sanding Belts

EdgeCore Ceramic Flap Discs

Buffing Kit
Shop By Product Category


Why Choose Red Label?

