Your Cart is Empty


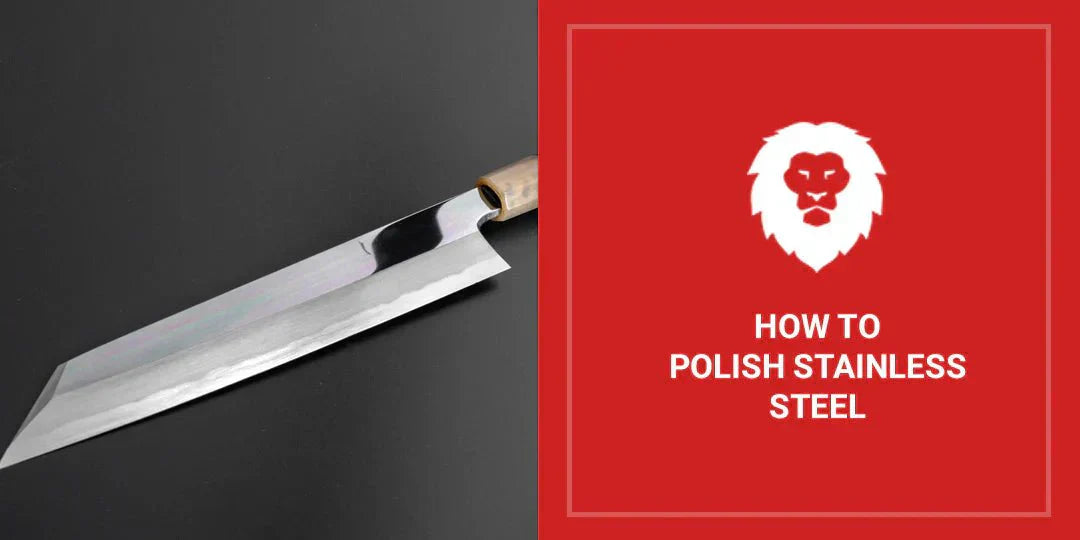
How To Polish Stainless Steel (The Full Guide)

Quick Summary
Stainless steel polishing starts with cleaning off grease and rust, then progresses through sanding grits from 36-120 for heavy welds/removal to 2000 to remove scratches and create a smooth surface. Hand polishing works for small pieces and detailed areas, while orbital buffers and belt sanders handle large flat surfaces faster. Mirror finishes require wet sanding with grits above 2000 and buffing with jeweler's rouge on a cotton wheel. Common mistakes include running polishers too fast, which creates swirl marks, and generating heat buildup that discolors the metal. Daily maintenance with microfiber cloths and periodic applications of ceramic coating or wax protect the polished finish for months. Red Label Abrasives sells factory-direct sanding belts and discs in all the grits you need, from heavy correction to mirror finishing.
Stainless steel is used across a wide range of industries, from automotive and appliances to furniture and knife making. It’s durable, corrosion-resistant, and won’t degrade under high temperatures. At the same time, its mirror-like surface is easily contaminated by fingerprints, water spots, and fine scratches from daily use. Over time, these issues can affect steel quality: when the protective chromium oxide layer is compromised by grime and scratches, rust forms in those vulnerable spots.
Polishing reverses this damage by removing oxidation, sealing micro-scratches, and restoring the chromium layer that keeps steel rust-free. The result is a mirror-bright surface that can last decades longer. For kitchen appliances, this means fewer replacements, while industrial equipment incurs lower maintenance costs. In this guide, the team at Red Label Abrasives walks you through every stage of stainless steel polishing: cleaning off old grime, sanding out deep scratches, building up to a mirror finish, and maintaining that shine long-term.
Materials and Tools You’ll Need to Polish Stainless Steel
Before you get started, make sure you have these tools and materials on hand:
- Cleaning Cloths: Microfiber cloths work better than cotton rags because they don't leave lint that can embed in the polish. You’ll want at least three: one for cleaning, one for applying compound, and one for final buffing.
- Dish Soap: Mild dish soap cuts through cooking oils and handling residue without stripping the steel's protective layer.
- White Vinegar: White vinegar dissolves water spots and light oxidation; it's acidic enough to work but won't pit the surface like harsher chemicals.
- Baking Soda: Baking soda makes a gentle abrasive paste for scrubbing without scratching.
- Polishing Compounds: Metal polishing compounds remove fine scratches up to 600 grit and work on all stainless grades. Look for formulas that contain mild abrasives suspended in oils: the oils lubricate while the abrasives cut. Some compounds offer a more aggressive cut for deeper imperfections, while others focus on final finishing work.
- Abrasives: Red Label Abrasives sanding belts and sanding discs handle the heavy correction work. You’ll need 220 grit to remove deep scratches and pitting, 320 grit to erase the 220-grit scratches, then 400 grit to smooth further. For mirror finishes, you'll need 800, 1200, 1500, and 2000 grit. Skipping grits leaves visible scratch patterns that show through the final polish.
- Power Tools: An orbital polisher runs at 1500-2000 RPM and accepts wool or foam pads. It distributes the compound evenly and prevents the hand fatigue that comes from manual buffing. Buffing wheels attach to bench grinders for stationary polishing: use cotton wheels for aggressive cutting or sisal for softer finishing work. A Dremel with small buffing attachments can reach tight corners on hardware and fixtures.
- Finishing Materials: Steel wool grade #0000 polishes without scratching, but only use it for final touch-ups. Coarser grades gouge the surface.
- Safety Equipment: Wear nitrile gloves to keep oils off the steel, as skin contact leaves prints that oxidize within hours. You should also wear safety goggles to block metal dust and compound spray. If you're using chemical degreasers or buffing compounds indoors, wear a respirator rated for organic vapors.
Recommended Abrasives
Zirconia alumina, ceramic, and aluminum oxide are the most recommended abrasive grains for sanding and polishing stainless steel due to their durability, heat resistance, and cutting efficiency on hard metals.
- Zirconia Alumina excels on stainless steel for stock removal, weld blending, and shaping; outperforms aluminum oxide by cutting faster with less heat buildup, ideal for heat-sensitive applications.
- Ceramic is best for tougher stainless grades like martensitic or high-nickel alloys; provides superior hardness, longevity, and uniform finishes during grinding and pre-polishing.
- Aluminum oxide is a reliable general-purpose option for lighter grinding, finishing, and non-ferrous metals, but less effective than zirconia or ceramic on stainless for heavy work.
These grains are commonly available in sanding belts, flap discs, and polishing compounds; start with coarser grits (36-80) for removal and progress to finer (120-400+) for polishing. Avoid silicon carbide for primary stainless work, as it dulls faster on ferrous metals.
What Finish Are You Looking For?
Generally speaking, the method and tools you use to polish your stainless steel surfaces and components will be determined by the kind of finish you’re looking for. Below is an overview of the most common finishing options.

Brushed Stainless Steel Finish
By brushing stainless steel, you create delicate parallel lines as decorative patterns. It works well in areas exposed to bright light because it lacks the typical reflective sheen of stainless steel. However, it can reduce the steel's resistance to corrosion, so rustproofing may be needed depending on the application.

Gloss Stainless Steel Finish
Glossy finishes improve corrosion resistance by smoothing crevices where rust can collect. It's perfect for automotive parts with its chrome-like shine, but it needs a well-prepared surface. After buffing, it can also achieve a mirror-like shine with the help of high-quality buffing compound and a grinder with a polishing wheel.

Matte Stainless Steel Finish
Matte finishes generally need less time, effort, and expense to achieve. They’re commonly used for practical purposes like kitchen or bathroom sinks and workbenches. A matte finish can usually be achieved with one or two buffing levels, such as 240 grit and 300 or 400 grit.

Mirror Stainless Steel Finish
With this highly reflective finish, stainless steel achieves its most iconic look. Besides hiding welded metal, it makes cleaning easier. If you want to polish stainless steel to achieve a mirror finish, you'll need buffing wheels with compound or abrasive belts in the super fine grits.
Do You Need To Sand Stainless Steel Before Polishing It?
Sometimes, but not always.
- When Sanding Is Necessary:Deep scratches, pits, rust, or heavy imperfections must be removed by sanding with progressive grits (e.g., starting at 220-400 grit) to create a smooth base, as polishing compounds alone can’t address advanced damage. For raw, mill-finished, or welded stainless steel, initial sanding levels the surface and prevents swirl marks during polishing.
- When You Can Skip Sanding:Minor surface imperfections, light scratches, or fingerprints can usually be handled with polishing compounds, microfiber cloths, or buffing pads without sanding. Well-maintained surfaces or those needing only a quick shine can proceed straight to buffing or hand polishing.
Always clean the surface first to remove contaminants, then assess damage. If sanding is needed, progress to higher grits (up to 1200-2000) before polishing for a mirror finish. Use lubricants like water during sanding to avoid heat buildup on stainless steel.
How to Prepare a Stainless Steel Surface for Polishing
Dirt, grease, and old polish block fresh compound from contacting the metal, so take the following steps:
- Fill a bucket with warm water and add two squirts of dish soap.
- Dip a microfiber cloth in the solution, wring it out until it's damp but not dripping, and wipe down the entire surface in straight lines following the grain of the steel. (Circular motions create swirl marks that show up after polishing.)
- Rinse the cloth frequently to avoid spreading grime around. For stubborn grease spots, like the areas around stove burners or range hoods, spray white vinegar directly on the spot, let it sit for 30 seconds, then wipe clean. Acetone works faster on industrial oils and adhesive residue, but use it in a ventilated area and wear gloves because it dries out skin.
Rust Removal
Light surface rust appears as orange or brown discoloration. You can remove it by mixing three parts baking soda with one part water to form a thick paste, spreading it over the rust spots, and letting it sit for 15 minutes. Scrub with a damp microfiber cloth using firm pressure: the mild abrasive action lifts the oxidation without gouging the steel.
For heavier rust buildup, dissolve one tablespoon of citric acid powder in one cup of warm water and apply this solution with a cloth, and let it work for five minutes before scrubbing. Avoid using muriatic acid or phosphoric acid on grades like 304 because these can pit the chromium layer and create permanent dull spots.
Initial Sanding
If you’ve got deep scratches and pitting, they need to be removed before the polishing compounds can work.
- Mount a 220-grit sanding belt on your belt sander or attach a 220-grit disc to an orbital sander.
- Sand in straight passes along the steel's grain: cross-grain sanding leaves scratches that are nearly impossible to remove later. Apply light pressure and keep the sander moving: staying in one spot generates heat that can warp thinner sheets and discolor the surface.
- After covering the entire area with 220 grit, switch to 320 grit and repeat the same pattern. The 320-grit pass erases the coarser scratches left by 220 grit. Finish this stage with 400 grit, which leaves a surface smooth enough for polishing compounds to refine further.
- Wipe the steel with a clean, damp cloth between each grit change to remove any metal dust that could contaminate the next abrasive level.
Different Stainless Steel Polishing Methods
Polishing brings out the shine by removing microscopic surface irregularities that scatter light. Hand polishing gives you control over small or delicate pieces, while machine polishing covers large areas faster and produces more consistent results. Mirror finishing takes the surface beyond shine into true reflection.
Hand Polishing
Hand polishing works best on small surfaces like cabinet handles, sink fixtures, and appliance trim, where power tools either can't reach or would remove too much material.
- Squeeze a dime-sized amount of metal polishing compound onto a clean microfiber cloth.
- Rub the compound onto the steel using small circular motions with moderate pressure. You'll feel resistance at first as the abrasives in the compound bite into microscratches. After 30-40 seconds of rubbing the same spot, the resistance decreases: that means the abrasives have done their job.
- Wipe away the dried compound residue with a fresh microfiber cloth, then inspect the surface under good lighting.
- Repeat the application on any areas that still show visible scratches.
For kitchen appliances that need a quick refresh rather than full restoration, mix equal parts white vinegar and olive oil in a spray bottle. Spray a light mist on the stainless surface and wipe it down with a microfiber cloth in straight strokes following the grain. The vinegar dissolves fingerprints and water spots while the olive oil fills in microscratches and leaves a protective sheen. This method won't remove deep scratches, but it restores shine to refrigerators and dishwashers in under five minutes. Reapply every two weeks to maintain the finish.
Machine Polishing
You can use an orbital buffer or belt sander for this step. Orbital buffers cut polishing time from hours to minutes on large flat surfaces like countertops, backsplashes, and commercial food prep tables.
- Attach a wool buffing pad to your orbital polisher and set the speed to 1500 RPM.
- Apply a quarter-sized dollop of polishing compound directly to the steel, not the pad: putting compound on the pad wastes product and creates uneven coverage.
- Turn on the polisher and spread the compound across a two-foot section using overlapping passes. The wool fibers grab the compound and work it into the steel's surface.
- Keep the polisher flat against the metal and moving at all times. Tilting the edge digs circular gouges into the finish, while letting it sit in one spot generates friction that warps the metal and burns the compound into a black residue that requires re-sanding to remove.
- Make three to four passes over each section, adding more compound only if the pad runs dry and starts skipping across the surface.
- After polishing the entire piece, switch to a foam pad and run one final pass at 2000 RPM with no additional compound. This buffs away any hazing left by the wool pad. Wipe the surface clean with a microfiber cloth to reveal the polished finish.
Belt sanders equipped with 2x72-inch sanding belts polish flat steel sheets faster than any other method.
- Start with an 800-grit belt and sand in straight, overlapping passes along the grain. The belt's continuous motion removes material uniformly without the circular patterns that orbital tools sometimes leave.
- For heat-sensitive work, like thin-gauge steel that warps easily, spray a mist of water on the steel before each pass. The water acts as a lubricant and coolant, preventing the temperature from rising above 150°F.
- After completing the 800-grit stage, move to 1200 grit, then 1500, then 2000. Each progression removes the scratches from the previous grit and brings the surface closer to a reflective finish.
Mirror Finish
A true mirror finish reflects images without distortion. After completing the 2000-grit sanding stage, switch to wet-sanding with 2500-grit and then 3000-grit abrasive sheets. Keep the surface wet during these passes, as dry sanding at such fine grits clogs the abrasive and scratches rather than polishes. The steel should feel glass-smooth to the touch after 3000 grit.
Once you’re done, mount a cotton buffing wheel to a bench grinder and apply jeweler's rouge, which is a fine red polishing compound made from iron oxide. Run the grinder at 3000 RPM and hold the steel against the wheel with light pressure. Buff each area for 15-20 seconds, checking frequently under bright light to monitor your progress: over-buffing generates heat that can ripple thin sheets, so work in short intervals and let the metal cool between passes.
For professionals who need factory-level mirror finishes on large batches, electropolishing delivers results that mechanical polishing can't match. This chemical process submerges the steel in an electrolyte bath while an electric current dissolves surface irregularities at the molecular level. The result is a completely uniform, defect-free finish with enhanced corrosion resistance. Electropolishing involves specialized equipment and training, but shops that process medical instruments or aerospace components use it as the standard finishing method.
Common Mistakes and Troubleshooting
Even experienced polishers can make mistakes. Below is an overview of common issues and how to correct them.
- Over-Polishing and Swirl Marks: Running an orbital polisher too fast or pressing too hard creates circular scratch patterns called swirl marks. Drop your polisher speed to 1200 RPM and let the polisher do the work instead of forcing it. If swirl marks already exist, you'll need to sand back down to 800 grit and restart the polishing progression. There's no shortcut to removing them with compound alone.
- Heat Buildup: Friction between abrasives and steel generates heat that discolors the surface with a rainbow tint or warps thin-gauge metal into permanent waves. This happens when you sand too long in one spot or use dry abrasives at high grits. Once heat discoloration sets in, sanding it out requires you to drop back to 220 grit and remove enough material to get below the affected layer. Prevent this type of damage by using water as a lubricant.
- Grade Mismatches: Grade 316 stainless contains molybdenum that makes it harder and more scratch-resistant than grade 304. This means 316 needs 30-40% more passes at each grit level to achieve the same finish as 304. If you're polishing marine hardware or medical equipment made from 316, start at 180 grit instead of 220 to cut through the tougher surface layer faster. Expect to spend an extra 10-15 minutes per square foot compared to kitchen-grade 304.
Pro Tip: Don't waste time trying to bring 304 to the same scratch resistance as 316: the alloy composition won't support it. Instead, plan to re-polish 304 surfaces every 6-12 months as part of regular maintenance.
Maintenance and Advanced Tips
A polished finish degrades the moment you touch it: fingerprints deposit oils that oxidize into permanent marks within 24 hours, while dust particles act like sandpaper when wiped across the surface with a dry cloth. Regular maintenance keeps the shine you worked hours to create, while advanced techniques let you integrate stainless polishing into larger workflows like knife making or metal fabrication.
Daily Care
- Wipe stainless surfaces with a dry microfiber cloth every day to remove fingerprints before the oils set.
- Never use paper towels, as the wood fibers scratch the finish, and don't use steel wool for routine cleaning, as it sheds tiny metal particles that embed in the surface and rust, leaving orange specks across your polished finish.
- For kitchen appliances, keep a spray bottle filled with equal parts water and white vinegar. Spray and wipe daily to prevent water spot buildup. This takes 30 seconds and prevents the need for full re-polishing every few months.
Long-Term Protection
Ceramic coatings bond to stainless steel at the molecular level and create a barrier that repels water, oil, and fingerprints. Clean the surface with isopropyl alcohol to remove any remaining oils, then wipe on the ceramic coating with an applicator pad in straight lines. Let it cure for 24 hours before touching the surface. A single application lasts 12-18 months on indoor surfaces and 6-9 months on outdoor installations exposed to weather. When the coating wears off, you'll see water beading less and fingerprints appearing more frequently: that's when you reapply.
Pro Tip:Carnauba wax sealants cost less than ceramic coatings and work well on appliances and decorative pieces that don't see heavy use. Apply paste wax with a foam applicator, let it haze over for five minutes, then buff it off with a microfiber cloth. Wax lasts 2-3 months before you need to reapply. It won't protect against scratches, but it makes fingerprints wipe off with a single swipe.
Red Label Abrasives: A Cut Above The Rest
Although stainless steel is one of the hardest metals to polish, you can restore its original shine. It doesn’t matter how large or small your project is: with the right tools and materials, you can get outstanding results.
At Red Label Abrasives, we have the resources you need to get a finish you’ll love. Red Label offers high-quality sanding discs, buffing wheels, and buffing compounds that smooth out and add luster to all types of metals, including stainless steel. If you have questions or would like to place an order, call 844-824-1956 or fill out our contact form today!
More Polishing Posts You May Be Interested In


Our Most Popular Abrasives

EdgeCore Ceramic Sanding Belts

EdgeCore Ceramic Flap Discs

Buffing Kit
Shop By Product Category


Why Choose Red Label?

