Your Cart is Empty


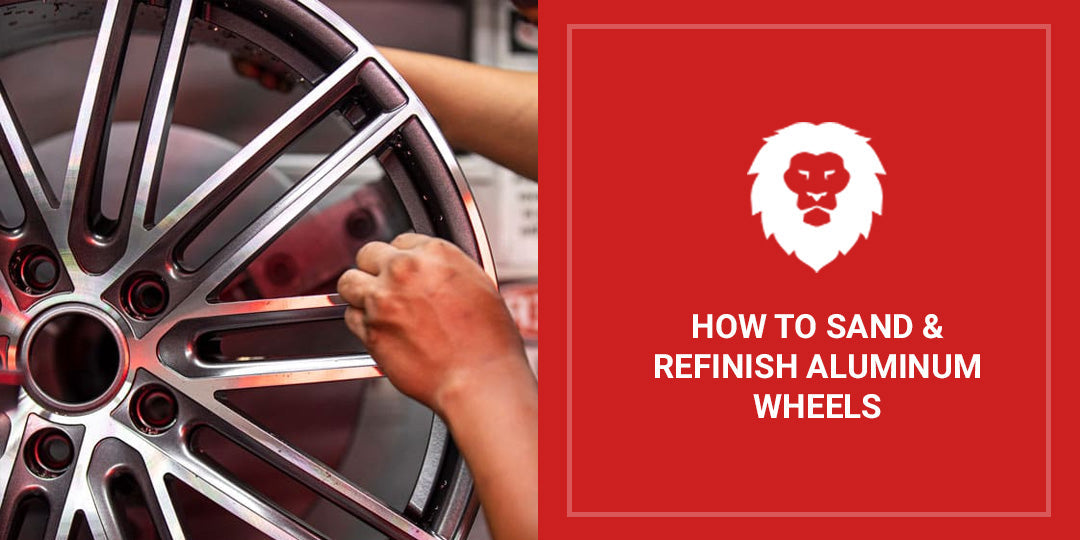
How To Sand & Refinish Aluminum Wheels

Key Takeaways
- Refinishing aluminum wheels involves cleaning, stripping (if needed), progressively sanding through the correct grit sequence, repairing damage, and choosing a final finish (polished, painted, or clear-coated). Starting with proper prep and ending with sealing and correct reinstallation ensures long-lasting results and protects against future corrosion.
- Identify your wheel’s finish before you start. Polished, clear-coated, painted, powder-coated, and machined aluminum wheels all require different sanding approaches, grit starting points, and refinishing steps. Misidentifying the finish can lead to over-sanding or improper adhesion.
- Follow a proper grit progression without skipping stages. Start with 80-120 grit for heavy curb rash, move through 180-320 for leveling, then refine with 400-600 grit before wet sanding from 800 up to 2000-3000 grit. Each stage removes the scratches from the previous grit and prevents visible sanding marks in the final finish.
- Choose the right finish based on appearance and maintenance needs. Polished aluminum offers a mirror shine but requires regular upkeep; painted wheels provide color flexibility and durability with primer and clear coat; clear-coated bare aluminum balances natural metal appearance with added protection.
- Seal and reinstall correctly to protect your work. Apply a dedicated wheel sealant after curing, clean the hub face before reinstalling, hand-thread lug nuts, and torque them in a star pattern to manufacturer specifications. Proper protection and installation extend the life of your refinished wheels.
Aluminum wheels can take a beating on the road. You might clip a curb, avoiding an erratic driver, expose the metal to road salt during winter travel, or build up brake dust. Over time, that damage adds up: curb rash, oxidation, surface scratches, and pitting can turn a sharp-looking set of wheels into an eyesore.
Fortunately, you don't have to pay a shop hundreds of dollars per wheel to fix it, and you won’t need to replace them before their time. Refinishing your aluminum wheels can save you a lot of money while extending the life of your wheels, protecting the aluminum from further corrosion, and bringing back that clean, finished look.
This guide walks you through everything you need to get it done, from the tools and materials to gather beforehand, to the full sanding sequence, to choosing between a polished, painted, or clear-coated finish. You'll also find tips on sealing and protecting your work, plus safety precautions to keep in mind throughout. Take it one step at a time, and you'll have refinished wheels worth showing off.
Types of Aluminum Wheel Finishes
Aluminum wheels come in different finishes, each of which calls for a different approach. The five most common are polished aluminum, clear-coated aluminum, painted aluminum, powder-coated aluminum, and a machined finish.
- Polished aluminum wheels have been buffed directly to a mirror-like shine with no coating on top: the luster comes from the metal itself.
- Clear-coated wheels look similar but have a transparent protective layer sprayed over the aluminum to guard against oxidation and minor abrasion.
- Painted wheels have a base coat of color (usually covered by a clear coat), letting them match the rest of the vehicle's body.
- Powder-coated wheels have a thick, durable finish applied electrostatically and cured under heat, making them more resistant to chipping than standard paint.
- Machined finish aluminum wheels are alloy rims with a bright, metallic surface. They often feature a contrasting two-tone look with painted inner pockets (e.g., black or gunmetal) and sealed with a clear coat to prevent corrosion and oxidation.
The finish of your wheels will dictate how deep you can sand, which grit to start with, and whether your end goal is a polished bare-metal look or a repainted surface. Sanding through a clear coat on a machined wheel, for example, needs a completely different grit progression than leveling curb rash on a powder-coated wheel.
Finish type also tells you whether you'll need primer, what kind of topcoat to use, and how much prep work stands between you and a finished result. Powder coat, for instance, is tough enough that mechanical removal or chemical stripping may be necessary before you can even begin sanding. A factory clear coat, on the other hand, can often be sanded through with 400–600 grit before moving into your repair and refinishing steps. Identifying your finish before you start saves time, prevents mistakes, and keeps you from removing more material than necessary.
Tools & Materials You'll Need
Safety Equipment
Sanding aluminum generates fine metallic dust that you don't want in your lungs, eyes, or ears. Before you start, put together a proper set of safety gear and make sure you have everything on hand before the first piece of sandpaper comes out.
- Chemical-resistant gloves
- Safety glasses or a face shield
- N95 dust mask or respirator
- Hearing protection
If you'll be using chemical strippers or spray coatings, a full respirator is a better choice than a basic dust mask, as the fumes from those products go well beyond what an N95 filters out.
Sanding Supplies
- Sanding discs (various grits)
- Sanding sheets (various grits)
- Sanding belts (for heavy damage removal)
- Scotch-style conditioning discs
- Sanding blocks
- Wet/dry sandpaper (full grit range)
For heavy damage removal, sanding discs and sheets in coarser grits handle the bulk of the work, while sanding belts can remove material on particularly deep curb rash or stubborn old coatings. Scotch-style conditioning discs are useful for scuffing surfaces before primer or clear coat, while sanding blocks are a must for flat sections of the wheel face.
Additional Materials
- Degreaser
- Dedicated wheel cleaner
- Masking tape
- Plastic sheeting
- Metal polishing compound
- Self-etching aluminum primer (if painting)
- Automotive clear coat
- Microfiber cloths
You'll need a quality degreaser and dedicated wheel cleaner to strip brake dust, road grime, and old wax before sanding begins. For the finishing stage, have metal polishing compound on hand if you're going for a polished look, or self-etching aluminum primer and automotive clear coat if you're painting.
Suggested Grit Progression
Using the right grit for each stage distinguishes a professional-looking result from one that still shows sanding marks.
|
Damage Level / Stage |
Recommended Grit |
|
Heavy damage (deep curb rash, stripping) |
80-120 grit |
|
Moderate damage (scratches, oxidation) |
180-320 grit |
|
Smoothing (removing coarse scratches) |
400-600 grit |
|
Pre-polish prep |
800-1500 grit |
|
Final polish or pre-clear coat |
2000-3000 grit |
Pro Tip: Never skip more than one grit stage. Each level removes the scratch marks left by the one before it, and jumping too far ahead leaves marks that show through your final finish.
Step 1: Remove and Clean the Wheels
Working on a wheel that's still mounted makes it nearly impossible to reach every section of the rim evenly. You also want to avoid the risk of getting chemicals, metal dust, or abrasive particles on your brake calipers, rotors, or wheel bearings.
Park on a flat, solid surface and loosen the lug nuts before you jack up the vehicle. Once the wheel is off, set it on a clean, stable work surface like a rubber mat or a low workbench. To clean, use a dedicated wheel cleaner to break down brake dust, then follow up with a degreaser to remove any built-up road grime, old wax, or tire dressing. Rinse completely and let the wheel dry fully before inspecting it closely under bright light for cracks radiating from the lug holes, visible bends in the rim, and any corrosion that goes deeper than surface oxidation.
Pro Tip: Not every damaged wheel should be refinished at home. Any wheel with a visible crack should be taken to a repair shop or replaced entirely. The same goes for wheels with a bent rim. Severe corrosion that has eaten through the metal also calls for replacement.
Step 2: Strip Old Finish (If Necessary)
If your clear coat is peeling away in sheets or bubbling up from the surface, the old coat needs to come off completely before you sand. The same applies to flaking paint and severe oxidation that has turned the surface chalky, pitted, or rough.
Mechanical Removal vs. Chemical Stripper
You have two options for removing an old finish: mechanical removal with abrasives, or chemical stripping with a dedicated paint and coating remover. Mechanical removal using 80–120 grit sanding discs gives you direct control over how much material you remove and where, making it a good choice for wheels with localized damage or partial finish failure. The tradeoff is time: working a full wheel by hand or even with a random orbital sander takes patience, especially on a wheel with a lot of contour and detail.
Chemical strippers work faster on full-wheel finish removal, but they have safety considerations. You'll need chemical-resistant gloves, eye protection, and good ventilation: many strippers contain methylene chloride or sodium hydroxide, both of which cause serious skin and eye irritation on contact. Follow the manufacturer's dwell time exactly; leaving stripper on too long can etch the aluminum itself.
Sanding to Bare Aluminum
Once the old finish is off, level the surface with coarse-grit sandpaper. Start with 80 grit for heavily damaged or uneven areas, or 120 grit if the surface is relatively flat but still rough. Keep your pressure consistent and avoid bearing down hard in one spot: aluminum is soft compared to steel, and heavy pressure can create low spots difficult to sand out later. Work in sections, moving methodically around the wheel so you don't lose track of where you've been.
Pro Tip: To avoid flat spots and uneven sanding, use a sanding block on flat sections of the wheel. On curved sections and spoke edges, let the sandpaper conform naturally to the contour rather than forcing it flat. Check your progress frequently by wiping the surface clean and viewing it at a low angle under a bright light.
Step 3: Repair Curb Rash and Surface Damage
Curb rash is the most common type of wheel damage. Start with 80 grit for deep gouges where the aluminum has been torn or scraped away, or 120 grit for shallower scrapes that haven't cut too far into the surface.
As you sand, pay close attention to where the gouge transitions back to undamaged metal. You need to feather those edges gradually rather than sanding them abruptly, or you'll create a visible ridge that shows through your final finish. Work outward from the deepest point of the damage in widening passes, blending the sanded area into the surrounding surface with consistent, overlapping strokes.
Once the damaged area is leveled and the edges are feathered, step up to 180 grit and then 320 grit to remove the coarse scratches left behind by your initial sanding. Work the entire repaired area, so the transition from repaired to original surface is invisible. At 320 grit, wipe the surface down with a clean microfiber cloth and inspect it closely under bright light. If the scratch pattern isn't consistent across the entire area, spend more time at 180 or 320 before moving on.
Filling Deeper Damage (Optional)
Some gouges are so deep that you’d need to sand away too much material to level them out. In this situation, we recommend a two-part aluminum-compatible metal filler. Apply it in thin layers, pressing it firmly into the gouge to avoid air pockets that can cause the filler to crack or shrink after curing.
Once the filler has cured completely, start sanding it with 120 grit to bring it flush with the surrounding aluminum. Use a sanding block to keep the surface flat and check frequently that you're not sanding the filler lower than the metal around it. Move through 180 and then 320 grit to blend the filler into the rest of the wheel surface before continuing your grit progression.
Step 4: Sand Progressively for a Smoother Finish
Each grit in the sanding sequence removes the scratch pattern left by the grit before it and replaces it with a finer, shallower scratch pattern of its own. By the time you reach 2000 grit or beyond, those scratches are so fine they become invisible to the naked eye, which is exactly what you want before polishing or applying a clear coat.
Suggested Sanding Sequence
|
Stage |
Grit |
Purpose |
|
1 |
320 |
Remove repair marks and level the surface |
|
2 |
400 |
Begin refining the scratch pattern |
|
3 |
600 |
Smooth surface, prep for wet sanding |
|
4 |
800 |
Start wet sanding, further refine |
|
5 |
1000 |
Continue wet sanding, reduce scratch depth |
|
6 |
1500 |
Pre-polish prep or pre-clear coat |
|
7 |
2000+ |
Final smoothing before polish or clear coat |
At each stage, wipe the surface clean and check your work before moving to the next grit. If you can still see scratches from the previous stage, keep sanding - don't move forward until the surface shows a consistent, uniform scratch pattern.
Wet Sanding Techniques
Starting at 800 grit, switch to wet sanding for the remainder of your progression. Wet sanding uses water as a lubricant between the sandpaper and the aluminum surface, which keeps the abrasive cutting clean and prevents heat from building up in the metal.
To wet sand, keep a spray bottle of clean water nearby and mist the surface frequently. You can also soak your wet/dry sandpaper in water for a few minutes before use. Use light, consistent pressure and keep the surface visibly wet at all times: if the water film disappears and you hear the sandpaper dragging drily against the metal, stop and add more water before continuing. Rinse the surface completely between grits to remove any residue that could contaminate the next stage.
Step 5: Choose Your Finish
The finish you choose determines how the wheel looks, what protection it has against the elements, and how much upkeep it'll need going forward.
Option A: Polished Aluminum Finish
A polished aluminum finish is the most labor-intensive of the three options, but the result (a mirror-like, reflective surface) is hard to beat. To get there, continue your wet sanding progression through 2000 and then 3000 grit. By the time you finish 3000 grit, the surface should look almost glossy when wet, with no visible scratch pattern remaining.
From there, apply a dedicated aluminum or metal polishing compound using a microfiber cloth or a foam polishing pad on a low-speed buffer. Work the compound into the surface in overlapping circular passes, then buff it off with a clean microfiber cloth before it dries completely. You may need two or three rounds of polishing compound to reach a true mirror finish.
The tradeoff with polished aluminum is ongoing maintenance. Without any protective coating on top, bare polished aluminum oxidizes relatively quickly, especially on a wheel that's constantly exposed to brake dust, road salt, and moisture. You'll need to re-polish every few months to maintain the finish. For drivers who don't mind that routine, the look is worth it.
Option B: Painted Finish
A painted finish gives you the most color options. Start by applying self-etching primer in two thin, even coats, allowing the manufacturer's recommended flash time between each one. Once the primer has fully dried, scuff it lightly with 400 grit wet/dry sandpaper to give the color coat a bond. When done, wipe the surface with a tack cloth to remove any dust before spraying.
Apply your color coat in thin, even passes, holding the can or spray gun 8 to 10 inches from the surface and keeping the spray moving at all times. Two to three color coats with proper flash time between each gives you a solid, even base for the clear coat, which goes on last. Two to three coats of automotive clear coat, with light 1500 grit wet sanding between each one, creates a glossy topcoat.
Pro Tip: Allow the final clear coat to cure fully before handling the wheel. Most automotive clear coats reach a dust-free state within 30 minutes, but don't reach full hardness for 24 to 48 hours, depending on temperature and humidity.
Option C: Clear-Coated Bare Aluminum
Clear-coating bare aluminum gives you a middle ground between the high-maintenance polished look and the full commitment of a painted finish. The aluminum's natural appearance shows through the clear coat, but the protective layer on top keeps oxidation and brake dust from attacking the surface directly. It's a popular choice for wheels that have been sanded to a smooth, uniform finish but don't need the mirror-like reflectivity of a fully polished surface.
The preparation is the same as for a painted finish: the aluminum needs to be clean, fully sanded through your complete grit progression, and free of any dust or residue before the clear coat goes on. Unlike a painted finish, there's no primer layer, which means any surface imperfection left in the aluminum will be visible through the clear coat once it's applied. Take extra time at the 1500 and 2000 grit stages to make sure the surface is as uniform as possible before you spray.
Apply two to three coats of automotive clear coat using the same technique described for the painted finish, and wet sand lightly between coats with 1500 grit. A clear-coated aluminum finish holds up better than uncoated polished aluminum, but it's more susceptible to chipping and peeling than a full paint system over primer. Reapplication every few years, or sooner if the clear coat shows signs of peeling, keeps the wheels looking clean and the aluminum protected.
Step 6: Final Protection and Reinstallation
Once your finish has fully cured, a coat of wheel sealant is the last line of defense between your refinished surface and everything the road throws at it. A dedicated wheel sealant (not a standard car wax) bonds to the wheel surface and creates a barrier that repels brake dust, road salt, and moisture.
Apply the sealant using a clean microfiber applicator pad, allow it to haze according to the product instructions, then buff it off with a fresh microfiber cloth. For polished aluminum wheels, use a sealant specifically formulated for bare or polished metal rather than a paint sealant. A single coat applied every three to four months keeps the surface protected and the wheels looking their best between washes.
Reinstall Wheels Properly
Before the wheel goes back on the car, clean the hub surface where the wheel seats. Rust, old brake dust, and debris on the hub face can prevent the wheel from seating flush. A wire brush and a wipe with a clean cloth removes any buildup quickly. You should also apply a thin film of anti-seize compound to the hub center bore if corrosion between the wheel and hub has been an issue in the past.
Hand-thread every lug nut before applying any torque to make sure none of them are cross-threaded. Snug them down in a star pattern (not in a circle) to draw the wheel evenly onto the hub face, then torque them to the manufacturer's specification using a calibrated torque wrench.
Get Premium Aluminum Abrasives at Red Label
Quality abrasives make a genuine difference in how cleanly each grit cuts and how consistent your scratch pattern is from one stage to the next. At Red Label Abrasives, we carry sanding discs, sanding sheets, wet/dry sandpaper, and conditioning discs in every grit you'll need for a full wheel refinishing project, all manufactured at our facility in Belding, Michigan, and sold factory direct. To learn more about our abrasives or place an order, please call 844-824-1956 or fill out our contact form.


Our Most Popular Abrasives

EdgeCore Ceramic Sanding Belts

EdgeCore Ceramic Flap Discs

Buffing Kit
Shop By Product Category


Why Choose Red Label?

