Your Cart is Empty


What Is Wet Sanding & Why Do It?

Quick Summary
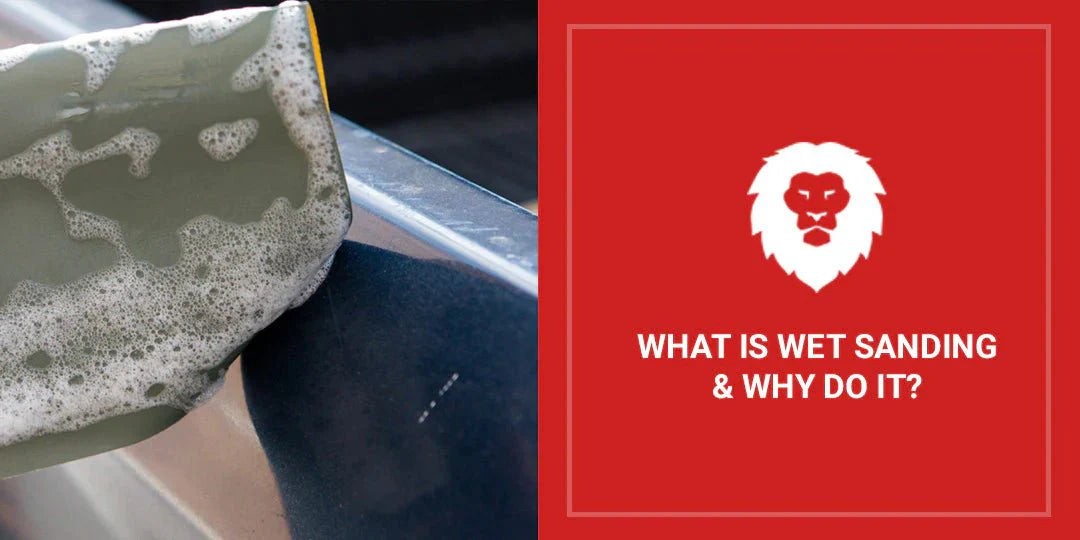
To quickly explain what wet sanding is: wet sanding is the process of using a liquid lubricant like water or WD-40 while sanding to wash away grit particles. Wet sanding helps to prevent surface scratches and is used to provide a smooth, even finish after dry sanding.
Wet sanding is a sanding process that uses water or another liquid as lubrication to wash away grit particles. Without the liquid, the sandpaper can build up with material, causing scratches that ruin the finish.
In general, the best liquid to use for most materials is water with a little bit of detergent in it. By lowering the surface tension of the water, the detergent reduces scuffing and helps wet paper and material more completely. WD-40 can be used as a lubricant instead of water if you're sanding bare metal.
At Red Label Abrasives, we get a lot of questions about the process, namely, “What is wet sanding, and why do it?” This blog explains the purpose of wet sanding, how you do it, and how the process differs from one material to another.
Why Wet Sand?
The purpose of wet sanding is to get an even surface finish after dry sanding. Dry sanding shapes the surface, while wet sanding removes the large scratches left by dry sanding. If done correctly, the surface will gradually level out, and the scratches will become smaller and smaller until they are no longer visible when the light reflects off of them.
It is important to use sandpaper that is specifically rated for wet sanding. The sandpaper can be folded over on itself to make a thicker piece, but it is even more effective if wrapped around a backing pad. Another option is to use sanding sponges with the abrasive already attached. By doing so, the sanding surface is able to conform to the shape of the material more easily.
To thoroughly wet sandpaper, many people suggest soaking it overnight in liquid. By doing so, the paper will not absorb any more moisture during the sanding procedure. If you can't soak the paper overnight, aim for at least 15 minutes of immersion before sanding.
It should also be noted that the physical process of wet sanding is different from dry sanding. For an even finish, dry sanding uses small circles, while wet sanding uses linear movements and alternate directions between passes. This is done to remove scratches from previous passes. Wet sanding only removes surface scratches and not much material, so use a light touch.
Benefits of Wet Sanding
Smoothing clear wood finishes with wet sanding results in finer quality. A wet sander can be used after sealant, varnish, or polyurethane has been applied to smooth out bumps, scratches, or imperfections on the surface. In addition to making scratches less visible, the water gives better control over the thickness of the finish. If you’re looking for a more satiny finish, you can opt for oil instead of water.
Other benefits of wet sanding are highlighted below.
Better Dust Reduction with Wood
When used in home interior jobs, wet sanding reduces a lot of dust compared to dry sanding. In high-end interior painting, wet sanding is used before painting as well as between coats. After the sanding dust gets wet, it doesn't ruin the paint.
Supports Paint Correction for Automotive
Automobile surfaces are extremely fine and can scratch easily, so they need to be sanded with care. When restoring a car's finish, wet sanding is the best approach, provided that care is exercised during application. You can use it to remove paint defects and even out new paint jobs.
Wet Sanding Vs. Dry Sanding
Both wet sanding and dry sanding have their benefits and you don’t have to exclusively use one or the other. For many applications that utilize wet sanding, you’ll likely want to start with dry sanding to do most of the sanding work. Dry sanding is great for aggressive material removal, shaping, and initial smoothing. Dry sanding can also protect the integrity of certain materials (like preventing wood grains from rising or metal from rusting). On the other hand, wet sanding prevents overheating, reduces dust production, and helps to achieve a smoother finish.
If you need a very smooth finish, you want to reduce cleanup time, or you’re working with heat-sensitive materials, it may make sense to add wet sanding to your process. If you’re working with water-sensitive materials or you’re looking to quickly remove large amounts of material, then you’d likely be better off sticking with dry sanding. You can also read a more detailed breakdown of the differences between the two methods in our post on wet sanding vs. dry sanding.
What are the Best Abrasives for Wet Sanding?
Not all abrasives are suitable for wet sanding. These applications require both a grit and a backing that’s suitable for wet environments. For example:
- Many of our orange hook and loop sanding discs are made with a premium waterproof polyester film and aluminum oxide abrasive grains. Their versatility makes them ideal for wet and dry sanding, and they're commonly used for auto body work.
- Our pressure sensitive adhesive (PSA) discs feature special waterproof polyester film aluminum oxide, closed coat silicon carbide, and closed coat zirconia abrasives. All are designed for excellent results in wet applications.
Our Wet Sanding Discs
How To Wet Sand By Application
How to Wet Sand Metal Surfaces
Sanding metal wet is often the best way to remove minor scratches and refinish dull surfaces to a high sheen. You’ll want to begin by wiping the metal surface with a degreaser to remove surface contaminants and prevent rust. Use an orbital sander and start with the lowest grit in your progression (180 grit is often a good place to start for metal finishing). Spray a fair amount of water on the metal surface as you sand. You’ll want to wipe and dry the surface and apply another round of degreaser between each grit. Make sure to apply a final coat of degreaser after you’re done sanding with the last grit in your progression.
How to Wet Sand Wood
Too much water on wood can cause wood to swell as the wood absorbs the water. For this reason, wet sanding often isn’t used on raw wood and is more commonly used to sand coated wood. Wood finishing typically involves applying varnish, polyurethane, or paint with a brush. Wet sanding can add an extra level of brilliance to wood surfaces by creating a smooth and uniform surface.
Grits can vary depending on the application, but you’ll likely want to start with a higher grit for wet sanding wood as opposed to metal (320 grit can be a good starting point). To avoid damaging the wood, you’ll want to use a spray bottle to apply water. You can also dip your fingers in a bucket of water and rub your hand over the surface of the wood. If you soak the wood with too much water, you can disturb the grain of the wood.
Make sure you allow enough time for the wood to dry between grits. If the wood pores don’t completely dry, they can leak water and dilute any stain or finish applied after sanding. You can run an air compressor over the surface to use air to speed up the drying process.
How to Wet Sand Plastic
Like metal, plastic will likely require a more aggressive lower grit to start. 180 grit is often a good starting point for wet sanding plastic depending on the application. Plastic is easily scratched and you can sand with irregular or circular motions to avoid deep scratches.
How to Wet Sand Drywall
Wet sanding drywall can help you smooth out applied compound and surface inconsistencies without the clouds of harmful dust produced by dry sanding. Wet sanding drywall is more time-consuming than dry sanding, but it is far healthier for your lungs.
Like wood, drywall can be easily damaged with too much water. Valleys, craters, and melted spots in the drywall are all signs of over-lubrication with water. You won’t use regular sanding sheets for wet sanding drywall. Instead, you’ll need abrasive sponges specifically designed for drywall sanding. One side of the sponge is coated with a medium grit while the other is coated with a fine grit.
To start sanding, dampen your sponge with water and then start working with the medium grit side first. The medium grit will sand down the high spots in the applied compound. It’s best to sand using a circular motion and you’ll want to wash your sponge out as it becomes clogged with debris. One to two passes of the medium grit should be sufficient before switching to the fine grit side. You’ll use the same circular motion with the fine grit side of the sponge to wipe away drips and create a smooth finish.
How to Wet Sand A Car
Auto body parts can be made of several different materials. Headlights are plastic while the body panels are made of metal. Despite the different qualities of each material, the process of wet sanding can be similar for both polishing headlights and finishing automotive paint.
1500 grit is a good starting point for wet sanding auto body work. For headlights that are heavily oxidized, you may want to start at 1000 grit. Sanding in circular motions can help to prevent deep scratches. You may also want to use a paint meter gauge to measure the thickness of the paint as you sand. It can be very easy to accidentally sand through the clear coat and paint down to the primer. If you take your time and keep surfaces properly lubricated with water, you can easily achieve a perfect new-car finish.
How to Wet Sand A Boat
Boat surfaces can either be painted or covered in gelcoat. Paint can provide a better-looking finish, but gelcoat will last longer. If you’re sanding gelcoat, you have to be very careful, because it’s easier to sand away than paint. Wet sanding is used to remove fiberglass oxidation and restore faded paint or gelcoat.
To avoid over-sanding, start with a finer grit and only revert to a lower grit if absolutely necessary. 320 grit is usually a good place to start for wet sanding a boat. Because boats have large surface areas, you’re going to want to use an electric dual-action sander (DA sander) to speed up the process. As you buff the surface, you’ll want to sand first in a side-to-side motion down a 2-foot by 2-foot section. You can then sand vertically up and down to achieve a uniform finish. You’ll likely need to resort to hand sanding for tighter spaces and edges on the boat.
Get the Best Wet Sanding Results with Red Label Abrasives
Dry sanding and wet sanding are intrinsically different, even though they both use sandpaper. At Red Label Abrasives, we sell abrasive products specially designed for use in wet sanding applications. Let us know what you’re working with and we’ll recommend the products and grit sequence you should follow to get perfect results. If you have questions or would like to place an order, call 844-824-1956 or fill out our contact form today!
Wet Sanding FAQs
Is Wet Sanding Ever Necessary?
Because wet sanding is more time-consuming than dry sanding, you may want to be more selective with the workpieces you wet sand. You can produce great results with dry sanding alone and you don’t necessarily have to wet sand. However, a professional-looking ultra-glossy finish is much easier to achieve with wet sanding.
Do I Need A Backing Pad To Wet Sand?
It is possible to wet sand without a backing pad, but it typically isn’t recommended. Small differences in sanding pressure can result in visible inconsistencies on the surface of the workpiece. Backing pads help to evenly distribute the pressure and prevent the sandpaper from folding back on itself.
Can You Use Wet Sanding To Remove Paint?
While wet sanding is commonly used for smoothing and finishing surfaces, it can be used for paint removal. Auto body shops and car restoration companies regularly use wet sanding to remove paint from cars.
One thing to note if you do plan to wet sand paint is that some local municipalities have strict regulations on the disposal of wastewater to reduce wastewater pollution. You’ll want to check with your city’s environmental services department to make sure you’re disposing of the wastewater in accordance with their guidelines. Spritzing surfaces with a spray bottle instead of using a continuous stream of water can significantly reduce the amount of wastewater you need to dispose of.
Can Wet Sanding Be Used To Remove Orange Peel Texture From Car Paint?
Removing orange peel texture from car paint is a great application for wet sanding. A bumpy surface that looks like an orange peel is caused by uneven spots in the paint. Wet sanding the higher spots down to create an even and smooth surface will correct the texture issue.
Can I Use Power Tools To Wet Sand Or Do I Need To Wet Sand By Hand?
You can use power tools for wet sanding. Tools like micro polishers and random orbital sanders are often used in auto body work with wet sanding to improve deeper scratches through the clear coat of paint or remove textures from paint. However, wet sanding is typically performed for detailed finishing work and usually yields better results when done by hand. It can be easy to over-sand when using power tools for wet sanding. Wet sanding by hand will also make it easier to feel rough or uneven spots on the material's surface.


Our Most Popular Abrasives

EdgeCore Ceramic Sanding Belts

EdgeCore Ceramic Flap Discs

Buffing Kit
Shop By Product Category


Why Choose Red Label?

