Your Cart is Empty


How to Heat Treat a Knife

Key Takeaways:
- Heat treating a knife involves heating the steel to a critical temperature, rapidly cooling it to harden, and then reheating it at a lower temperature to reduce brittleness and improve toughness.
- Heat treatment determines a knife’s performance, controlling hardness, toughness, and edge retention even when the steel type stays the same.
- Steel changes at the microscopic level during heating and cooling, forming different phases that directly impact strength and durability.
- The three main stages - normalizing, hardening, and tempering - work together to refine grain, increase hardness, and reduce brittleness.
- Temperature control, cooling rate, and steel composition all influence final results, making consistency critical for repeatable performance.
A knife’s edge retention, toughness, and wear resistance all stem from one source: heat treatment. While the steel composition sets the potential, heat treatment determines how that potential is realized. In other words, two blades made from the same steel can perform very differently based on how they are heated, cooled, and tempered.
At a material level, heat treatment changes the arrangement of carbon within the iron matrix. When steel reaches its critical temperature range, it can harden during cooling. Controlled cooling then locks it in, creating a harder matrix that supports a sharp, stable edge. But without proper control, the steel can develop uneven hardness, internal stress, or even brittleness. In this guide, we’ll outline how each stage of heat treatment changes the steel in your knife and how you can achieve the best results.
What Happens Inside Steel During Heat Treatment?
Steel changes at the microscopic level when you apply heat. At room temperature, most carbon steel exists in a form called ferrite mixed with iron carbide. This material is relatively soft, which allows machining and shaping before heat treatment begins.
When you heat steel into its critical range (usually between 1,450°F and 1,600°F, depending on the alloy), the material transforms into austenite. In this phase, carbon atoms dissolve into the iron lattice, creating a uniform internal state that can later harden during cooling.
Cooling rate determines what forms next. Rapid cooling traps carbon atoms in place, creating martensite, which is hard and brittle, while slower cooling can form pearlite or bainite, which are softer and more ductile. The choice of cooling method directly affects how the blade performs when used.
Grain size also affects performance. Excessive heat or extended time at high temperatures causes grain growth, which reduces toughness and increases the chance of cracking. Controlled heating keeps the grain structure fine, which improves strength and edge stability.
Pro Tip: Decarburization can occur during heating if the steel is exposed to oxygen. This condition reduces carbon content at the surface, which lowers hardness in that area. Proper control of the heating environment limits this issue.
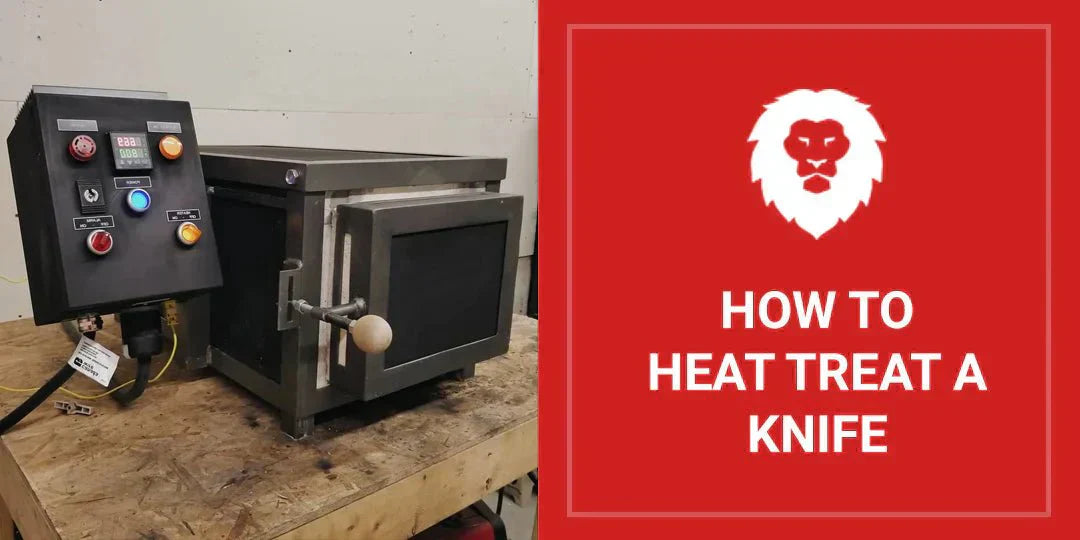
What Equipment Do You Need to Heat Treat a Knife?
- Knife blade with beveling applied and surface brought to the preferred finish (once it is hardened, it will be harder to remove material via filing and sanding)
- Heat source (e.g. propane torch, mini-forge, or charcoal forge)
- Fireproof quench container with lid. You can use metal coffee cans, a cookie tin, or something similar.
- Oil for quenching. Realistically, most types of oil will work for this. Do not use water, however- it cools too quickly and will crack most steels.
- Fireproof regulator block, such as an aluminum tube, to hold the blade at the correct depth in the quench oil.
- Magnet for testing the steel temperature
- Tongs or vise-grip pliers for holding the blade safely during heating, quenching, and tempering.
- Fire extinguisher designed for grease or oil fires
- Face shield and heat-resistant gloves
- File for testing blade hardness
- Kitchen oven (recommended)
Step-by-Step Heat Treatment for Knives
Heat treatment follows a sequence that prepares the steel, hardens it, and then refines its mechanical properties. Each phase builds on the previous one, so consistency at every stage determines the final result.
Normalizing: Preparing the Steel
Normalizing prepares the steel for hardening by refining the grain and relieving internal stress from grinding or forging. The blade is heated above its critical temperature and then allowed to cool in still air. This step resets the internal condition of the steel so the next phase produces consistent results.
During this stage, the steel transitions into austenite and then cools at a controlled rate. This cooling allows a more uniform grain to form throughout the blade, improving toughness and reducing the risk of warping during later heating and cooling cycles.
Below are recommended normalizing temperatures for the more popular knifemaking steels.
|
Steel Type |
Normalization Temperature |
|---|---|
|
1045 |
1575℉ |
|
1060 |
1525℉ |
|
1525℉ |
|
|
1080 |
1650℉ |
|
1084 |
1550℉ |
|
1575℉ |
|
|
W1 |
1575℉ |
|
White Steel No.2 |
1575℉ |
|
White Steel No.1 |
1700℉ |
|
S1 |
1600℉ |
|
S5 |
1600℉ |
|
5160 |
1550℉ |
|
8670 |
1550℉ |
|
L6 |
1550℉ |
|
15N20 |
1525℉ |
|
80CrV2 |
1525℉ |
|
O1 |
1575℉ |
|
O2 |
1550℉ |
|
W2 |
1575℉ |
|
52100 |
1675℉ |
|
CruForgeV |
1600℉ |
|
V-Toku2 |
1600℉ |
|
1.2519 |
1675℉ |
|
Blue Steel No.2 |
1600℉ |
|
1.2442 |
1600℉ |
|
V-Toku1 |
1600℉ |
|
O7 |
1675℉ |
|
26C3 |
1700℉ |
|
Blue Steel No.1 |
1700℉ |
|
1.2562 |
1700℉ |
|
Blue Super |
1700℉ |
Pro Tip: You can use a magnet to check the temperature. Knifemaking steel uses its magnetic ability at around 1425℉, so once you reach the point that it’s non-magnetic, you’re almost at the ideal temperature. Heat the steel a couple of shades brighter, and you should be at the correct heating point. You can also test the temperature by putting salt on the blade: salt melts at 1474℉
Hardening: Creating Maximum Hardness
Hardening sets the foundation for edge retention. During this stage, the blade is heated back into the austenitizing range and held long enough for carbon to distribute evenly within the metal. Temperature control at this stage is critical, since overheating can lead to grain growth while underheating can prevent full transformation.
After reaching the correct temperature, the blade is cooled rapidly using a quenching medium. Take the following steps:
- Plunge the steel into a can of oil and move it back and forth in a slicing motion. This helps to prevent air bubbles from forming around the steel.
- For the blade to harden, it needs to cool below 900℉. Wait about 10 to 15 seconds before pulling the blade out and checking it for warping. If it looks good, take a file and scrape its corner across the steel. A properly hardened blade will be stronger than the file and resist scratching.
- Lay it on the regulator block, which should be submerged in the oil. (The block ensures that both sides of the blade are evenly cooled.)
Pro Tip: Many knifemakers recommend using canola oil heated to around 130℉. They say that water tends to cool the steel too quickly, which can lead to cracking, especially if the blade is on the thin side. In comparison, oil has a slower cooling rate. You can heat it up on your stove or use your forge to heat up a piece of rebar before plunging it into the oil to raise the temperature.
Tempering: Adjusting Hardness and Toughness
Tempering reduces brittleness while maintaining useful hardness. The blade is reheated to a lower temperature, usually between 300°F and 500°F, depending on the desired properties. This step allows some of the trapped carbon to redistribute, which reduces internal stress.
The result is a blade that holds an edge while resisting chipping under normal use. Multiple tempering cycles are common to achieve consistent performance throughout the steel. Skipping or rushing this phase can result in a weaker blade.
Post-Heat Treatment Surface Work
By now, your blade is fully hardened. Now all you need to do is sand away any scale that may have accumulated over the blade after quenching. Apply a fine abrasive to your belt sander and run it carefully over the surface until the steel is clean. Then you can complete the final steps, which are applying an additional bevel at the desired angle and using a fine grit for final sharpening and polishing.
Common Challenges With Heat Treating Knives (and How to Address Them)
Heat treatment introduces stress into the steel, which can lead to defects if you’re not careful. They include:
- Warping: Uneven heating or cooling causes the blade to bend or twist. Thin sections cool faster than thicker areas, which can create internal stress. Even heat distribution and controlled quenching reduce distortion, while proper fixturing helps maintain shape during heating.
- Cracking: Rapid cooling or excessive internal stress can cause fractures in the steel. Water quenching increases this risk, especially in higher carbon steels. Switching to oil or adjusting quench temperature reduces stress and lowers the chance of failure.
- Excessive Brittleness: Steel that remains too hard after quenching can chip or fracture under use. This condition results from insufficient tempering or incorrect tempering temperature. Running multiple tempering cycles at the correct range improves toughness.
- Soft Spots: Inconsistent heating or insufficient soak time can prevent full transformation in certain areas. These zones do not harden properly and wear faster during use. Accurate temperature control and adequate hold time eliminate this issue.
- Surface Scale and Oxidation: Exposure to oxygen at high temperature forms a layer of scale on the steel. This layer must be removed before final finishing. Abrasives clean the surface and restore a uniform finish.
- Decarburization: Loss of carbon at the surface reduces hardness in that area. This occurs when steel is heated without protection in an oxygen-rich environment. Controlled atmospheres or protective coatings help maintain consistent surface properties.
Each of these challenges traces back to issues with heating or cooling conditions. When you control those variables, you stand the best chance of avoiding defects.
How Abrasives Help Before and After Heat Treatment
Abrasives help direct how the blade responds to heat treatment and how it performs afterward. Surface condition affects heat transfer, oxidation, and final edge quality, so preparing the blade before heat treatment and refining it afterward ensures consistent results.
- Pre-Heat Treatment Surface Preparation: A clean, uniform surface allows heat to distribute evenly across the blade. Grinding marks, oil, or debris can create uneven heating, which leads to inconsistent hardness. Sanding belts or discs remove contaminants and produce a consistent finish before the blade enters the furnace.
- Scale Removal After Heat Treatment: High temperatures create a layer of oxide scale on the steel surface. This layer is hard and brittle, which interferes with sharpening and finishing. Abrasives remove this material efficiently, exposing clean steel underneath.
- Refining Surface Finish: After scale removal, the blade surface may show discoloration or minor irregularities. Progressive abrasive grits smooth the surface and prepare it for final finishing. A consistent finish improves both appearance and cutting performance.
- Edge Preparation: Abrasives shape and refine the cutting edge after heat treatment. Controlled material removal ensures the edge geometry supports sharpness and durability. Proper grit selection prevents overheating, which could affect the tempered steel.
- Consistency Across Batches: Using the same abrasive types and grit sequences produces repeatable surface results. Consistency at this stage ensures that each blade performs the same way during use.
Clean surfaces, controlled material removal, and consistent finishing lead to a blade that cuts cleanly and holds its edge. When surface preparation and finishing are handled correctly, the benefits of heat treatment carry through to the final product.
Get Quality Heat Treatment Results With Red Label Abrasives
Your heat treatment approach determines how the finished knife performs. When you apply controlled heat, manage cooling rates, and refine the surface with the right abrasives, you produce a blade that works as intended. Each stage builds on the last, and consistency at every point leads to a finished knife that holds its edge and resists wear under regular use.
If you’re a knife maker looking to improve your craft, Red Label Abrasives carries a full range of sanding belts, sanding discs, sanding sheets, and even entire knifemaking kits. We invite you to explore our product line to find the right abrasive for your workflow and achieve a clean, uniform finish on every blade. To learn more about our products or place an order, please call 844-824-1956 or fill out our contact form.
Heat Treat FAQS
How Do You Heat Treat a Knife in the Oven?
As we mentioned earlier, once a knife has been heated to its critical temperature and quenched, the steel is extremely hard but brittle as glass. Even dropping it on a floor could cause it to shatter. For many knife makers, a kitchen oven is the ideal tool for tempering, which reduces the brittleness and adds toughness to the blade. Here’s how:
- Clean the Blade: After quenching, the knife will be covered in burnt oil and scale. Scrub it clean with soap and water or light sandpaper so you can see the color of the metal.
- Preheat the Oven: Set your oven between 350°F and 450°F. For a kitchen knife or a fine-edged tool, 400°F is a standard starting point.
- Bake the Blade: Place the knife on a middle rack. Bake it for two hours.
- Cooling: Turn off the oven and let the knife cool slowly to room temperature in the air.
- Repeat (Optional but Recommended): Many makers perform a second two-hour cycle to ensure the internal stresses of the steel are fully relieved.
Pro Tips:
- Use an Oven Thermometer: Home ovens are notoriously inaccurate and can fluctuate by 25°F or more. A cheap internal thermometer will help you ensure you aren't accidentally "drawing the temper" too much (making the knife too soft).
- Watch for Colors: As the steel heats, it will change color. At 400°F to 450°F, the steel should turn a light straw or golden yellow. If it turns blue or purple, your oven is too hot, and the steel has become too soft to hold a sharp edge.
What Are the Best Abrasives for Sharpening a Heat-Treated Knife?
- Aluminum Oxide: Aluminum oxide is one of the most common abrasives used in belts and stones. It cuts steadily and wears at a predictable rate, which makes it useful for general sharpening. It works well on standard carbon steels and softer stainless steels.
- Zirconia Alumina: Zirconia abrasives are tougher than aluminum oxide and last longer under pressure. They are suited for heavier material removal or reshaping an edge. These abrasives are commonly used in sanding belts for metalworking because they maintain cutting ability over time.
- Ceramic Abrasives: Ceramic abrasives cut very aggressively and maintain sharp cutting edges as they wear. They are used when working with harder steels that resist standard abrasives. This type removes material quickly and produces a consistent scratch pattern.
- Silicon Carbide: Silicon carbide is sharper but more brittle than aluminum oxide. It cuts quickly and is often used in finer grits or for finishing stages. It works well when refining an edge after initial sharpening.
What Oil Do You Use to Heat Treat a Knife?
The choice of oil for heat treating a knife depends on the type of steel you’re using and its cooling requirements. For example, most high-carbon steels used in bladesmithing need a medium to fast quench to achieve maximum hardness.
Professional-grade quenching oils are engineered for this purpose because they have a controlled flash point and provide consistent cooling rates that minimize the risk of warping or cracking the blade. These specialized oils often contain additives that prevent the formation of vapor bubbles, ensuring the oil makes direct contact with the steel throughout the cooling process.
If you don’t have access to dedicated quenching oil, food-grade vegetable oils like canola or peanut oil serve as common alternatives for home smiths. Canola oil is particularly popular because it is inexpensive, has a relatively high smoke point, and provides a cooling rate fast enough for many common carbon steels like 1084 or 1095. It is standard practice to preheat these vegetable oils to roughly 50°C to 60°C before quenching.
While some resources suggest using motor oil or transmission fluid, these are generally avoided in modern knifemaking because:
- Used motor oil contains heavy metals and contaminants that release toxic fumes when they come into contact with red-hot steel.
- The cooling rates of automotive fluids aren't optimized for metallurgy, which can lead to soft spots in the blade or unnecessary stress on the steel.
Stick to either a dedicated fast-quench oil for high-performance results or a preheated vegetable oil for a safer, more accessible option.
Resources:


Belt Packs Made For Knife Makers

2 X 72 Inch Knife Makers Sanding Belts Assortment

2 X 60 Inch Knife Makers Sanding Belts Assortment

2 X 48 Inch Knife Makers Sanding Belts Assortment

2 X 36 Inch Knife Makers Sanding Belt Assortment

2 X 42 Inch Knife Makers Sanding Belts Assortment

1 X 30 Inch Knife Makers Sanding Belts Assortment

1 x 42 Inch Knife Makers Sanding Belt Assortment
Shop By Product Category


Why Choose Red Label?

