Your Cart is Empty


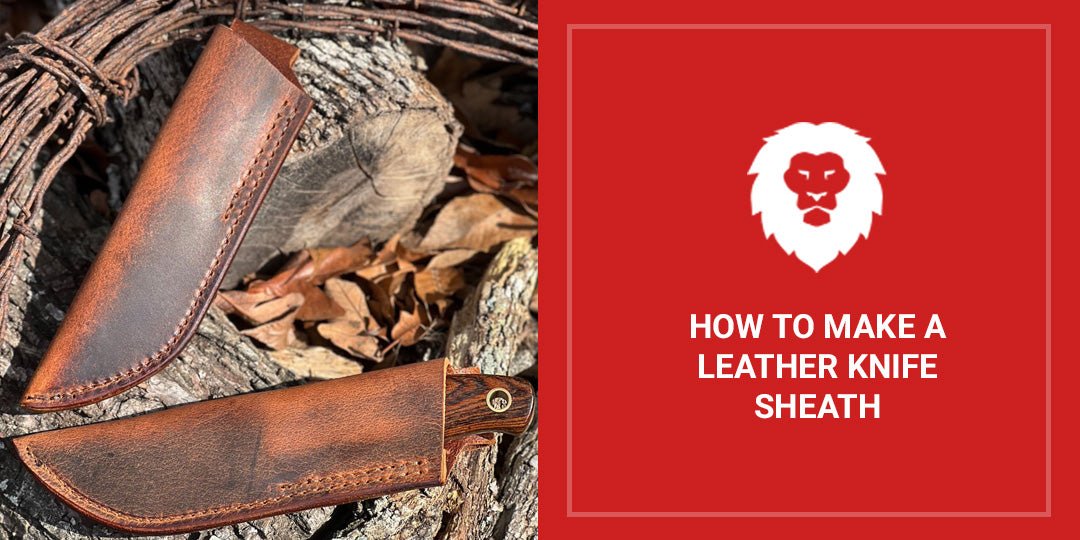
How to Make a Leather Knife Sheath

Quick Overview
There are various styles of sheaths, such as pouch, pancake, scabbard, fold-over, western, and dangler. Making them requires materials and tools like vegetable-tanned leather, durable thread, needles, and optional items like dye and edge bevelers. It’s also important to choose the right leather for both functionality and style. The process includes designing the sheath to fit the knife's dimensions, with tips on customizing through tooling, dyeing, and embellishments.
If you carry your knives with you, you’ll want a leather sheath to protect both your blade and your fingers. While you can certainly buy one in a specialty store or online, it’s surprisingly easy to make one yourself.
A well-made sheath not only ensures the safety and longevity of your knife but also adds a touch of personal style to your gear. Leather, with its durability and classic appeal, is the ideal material for this purpose, and creating your own sheath creates a sense of accomplishment and satisfaction. In this blog the team at Red Label Abrasives guides you through the steps to create your own leather knife sheath, ensuring your knife is not just well-protected but also carries a piece of your personal craftsmanship.
What Are the Different Types of Knife Sheaths?
When it comes to leather knife sheaths, there are several styles to choose from, each offering its own practical benefits. Here are some of the different styles you might consider:
- Pouch Style Sheath:This is one of the most common styles. The knife slips into a leather pouch, and the fit alone holds the knife in place. It’s simple, efficient, and works well for a variety of knife sizes.
- Pancake Style Sheath: This sheath involves two pieces of leather stitched together with the knife sandwiched in between. It’s flat and often has belt loops attached for easy carrying. This style is popular for its slim profile and ease of access.
- Scabbard Style Sheath: Designed like a traditional sword scabbard, this sheath fully encases the blade and part of the handle. It often features a strap to secure the knife in place. This style is great for larger knives and provides excellent protection.
- Fold-Over or Taco Style Sheath:Here, a single piece of leather is folded over the knife and stitched up one side. This style is straightforward to make and can be customized with different stitching patterns and designs.
- Western or Cowboy Style Sheath:Characterized by intricate designs and often with fringes, this style is more decorative. It's typically worn on the belt and is a favorite among those who appreciate a classic, rustic look.
- Dangler Style Sheath: This sheath hangs from the belt through a loop, allowing more movement and flexibility. It's ideal for those who are frequently sitting and standing, as it doesn’t interfere with movement.
Each of these styles has its own set of characteristics, and the choice depends largely on personal preference, the type of knife, and the intended use of the sheath. Whether you prioritize ease of access, protection, or a more attractive appearance, there’s a leather knife sheath style to suit your needs.
Tools and Materials Needed
To make a leather knife sheath, you'll need a collection of specific materials and tools. Here’s a list of what you’ll require, along with some guidance on selecting the right type of leather:
- Leather:The cornerstone of your sheath. For durability and form, vegetable-tanned leather is an excellent choice. It’s sturdy and holds its shape well, making it ideal for a sheath. The thickness of the leather should be around 8 to 9 oz (about 1/8 inch thick) for optimal protection and longevity.
- Thread: You'll need strong, durable thread. Waxed linen or synthetic threads like nylon or polyester are great choices, as they’re strong and resistant to rotting.
- Needles: Use harness needles for leather stitching. They have a blunt end that doesn’t split the leather, making them perfect for hand-stitching.
- Leather Dye (Optional):If you want to add color to your sheath, leather dye can be used. It’s available in various colors, so you can personalize your sheath's appearance.
- Leather Finish:To protect the finished sheath, apply a leather finish or conditioner. This will keep the leather supple and protect it from moisture and dirt.
- Adhesive:A strong leather glue can be used for additional bonding, especially in areas that will be stitched for extra reinforcement.
- Edge Beveler (Optional):This tool can be used to smooth and round the edges of the cut leather for a more professional look.
- Stitching Groover:This tool creates a groove for the stitches to lie in, which helps protect the thread from wear.
- Ruler and Pen:For measuring and marking your leather before cutting.
When choosing your leather, consider the sheath's intended use. If it’s for rugged outdoor use, choose a thicker and more robust leather. For a sheath that's more about style, you might opt for a finer grain. The key is to find a balance between appearance and functionality to create a sheath that’s both attractive and practical.
Designing Your Sheath
To begin, you need to measure the full length of your knife from the tip of the blade to the end of the handle, as this will define the length of your sheath. You’ll also want to measure the widest part, which is usually at the handle or guard, to ensure the sheath fits well. Don’t forget to measure the thickness of your knife to provide adequate space inside the sheath.
Once you have the measurements, sketch out an outline on paper. This acts as a template for when you cut the leather. Remember to add a little extra space, about 1/8 to 1/4 inch, around your measurements to accommodate for stitching and the thickness of the leather itself.
In terms of design, you have several choices to make. First, consider whether you want a belt loop or a clip on your sheath. Next, decide on the style — be it a pouch, pancake, or scabbard — depending on your knife type and personal preference. You should also think about whether you want a flap over the top of your sheath for added security or prefer an open-top design for easier access.
If you want to customize, the sky’s the limit! You can add unique patterns or designs using leather tooling or stamping, which can give your sheath a distinct look. Dyeing the leather in your choice of color can also add a personal touch. When it comes to stitching, selecting a thread color that contrasts or complements the leather can really add to the appearance. Finally, consider embellishments like beads, metal fittings, or engraved plates to truly make the sheath your own.
Cutting the Leather
Once you have designed your knife sheath and prepared your template, the next step is to cut the leather. This stage is important because it sets the foundation for your sheath’s final look and fit.
Before you start cutting, place the leather on a flat, stable surface. Ensure that it is clean and dry. If you have a cutting mat, use it to protect your work surface and to get cleaner cuts. Then lay your paper template over the leather. You can use a pen or a stylus to trace around the template and transfer the design onto the leather. Be as precise as possible to ensure accuracy in your cuts.
For the actual cutting, use a sharp utility knife or a leather cutter. The key to a good cut is using a sharp tool; a dull blade can result in uneven edges and more effort on your part. Once you’ve chosen a knife, hold it firmly and cut with a steady, controlled motion. Try to make the cuts in one continuous line for each side of the template. This will help in maintaining a smooth edge. If your design has curves, go slowly and gently guide the knife around these areas.
Safety Tips
When cutting leather, safety is paramount. Sharp tools can easily cause injury if not handled correctly.
- Always cut away from your body to reduce the risk of the knife slipping towards you.
- Keep your fingers and other hand clear of the blade’s path.
- Make sure your cutting blade is securely attached to its handle.
- Use a cutting mat to avoid damaging your work surface and to help control the cut.
- Store your cutting tools properly when not in use.
Remember, patience is key. Don’t rush the cutting process. Take your time to ensure that your cuts are clean and accurate. This will make stitching and finishing much easier and lead to a better-quality sheath.
Shaping the Sheath
After cutting the leather to the desired shape, the next step is to mold and shape the leather around the knife to ensure a perfect fit. This process is crucial as it determines how well the sheath will hold and protect your knife.
Wet Molding Technique
This process involves dampening the leather to make it more pliable, allowing it to form around the knife more easily. Here are the steps:g
- Dampen the Leather:Use a sponge or cloth to evenly wet the leather. It should be damp but not soaking wet. The leather will darken and become more flexible.
- Wrap the Knife:To protect your knife from water, wrap it in plastic cling film or a plastic bag. This also prevents any potential rusting.
- Mold the Leather: Place the wrapped knife onto the damp leather. Gently press and mold the leather around the knife with your fingers, starting from the blade and moving toward the handle. Focus on areas like the handle and any curves or contours of the knife.
- Secure the Shape:You can use elastic bands or clamps to hold the leather in place around the knife. Be careful not to over-tighten, as this can leave marks on the leather.
- Drying: Leave the leather to dry naturally. This could take several hours to a day, depending on the humidity and temperature. Avoid using heat sources like hair dryers, as this can cause the leather to harden unevenly.
Periodically check the fit by gently removing the knife and reinserting it. This helps ensure that the sheath isn’t too tight or too loose. If there’s excess leather after molding, trim it carefully to refine the shape and fit of the sheath.
Once the leather has dried, you can reinforce the shape by pressing along the edges and contours with a bone folder or a similar tool. This will give a more defined and professional look to your sheath.
Tips for a Perfect Mold
- Ensure even dampening of the leather for a consistent shape.
- Take your time with the molding process, working the leather gently to avoid overstretching.
- Keep checking the fit to make adjustments as needed.
Stitching the Sheath
Once your leather sheath is cut and molded to the shape of the knife, the next step is stitching it together. Proper stitching not only adds to the sheath's durability but also enhances its appearance.
Choosing the Thread and Needle
When it comes to thread, durability is key. Waxed linen or synthetic threads like nylon or polyester are recommended for their strength and resistance to wear and tear. The wax coating on the thread also helps it glide through the leather more smoothly and prevents tangling.
Regarding the needle, blunt-ended harness needles are ideal for leather stitching. They are designed to pierce through tough materials without cutting or damaging the fibers, which is essential in maintaining the integrity of the leather.
Preparing for Stitching
Use a stitching groover or an overstitch wheel to mark where your stitches will go. This not only ensures even spacing but also gives a professional look to your work. Then pre-punch the stitch holes using an awl or a pricking iron. This makes the stitching process smoother and more precise.
Stitching Techniques
- Saddle Stitching: This is a popular method for leatherwork. It involves using two needles on either end of a single thread. The thread is passed through each hole from both sides, creating a durable and neat stitch.
- Backstitching: At the start and end of your stitch line, do a few backstitches. This means going back over two or three previous stitches. It secures the thread and prevents unraveling.
Stitching the Sheath
Thread your needles and start from one end of the sheath. Ensure your stitches are tight and evenly spaced for the best results. Pull each stitch tight as you go to ensure the sheath stays secure and the stitches don’t loosen over time.
Pro Tip:As you stitch, keep the tension consistent. Uneven tension can lead to puckering or weak spots in the seam.
Once you reach the end of your stitch line, secure the thread with backstitches and trim the thread close to the leather, being careful not to leave any sharp ends.
Finishing Touches
The final step is to add the finishing touches that will give it a professional look and enhance its durability. Paying attention to the edges and the treatment of the leather can make a significant difference in the overall quality of your sheath.
Finishing the Edges
Start by smoothing out the edges. You can use a sanding block or a piece of fine-grit sandpaper to gently sand the edges until they are even and smooth. To give a more refined look, use an edge beveler tool to trim off the sharp edges. This creates a slight slope on the edges, making them more comfortable to handle and giving a polished appearance.
Other finish options include:
- Burnishing: Burnishing the edges seals them and adds durability. You can use a burnishing tool or simply a piece of canvas cloth. Rub the edges vigorously to create friction, which heats and slightly melts the leather fibers, resulting in a smooth, shiny finish.
- Edge Paint or Dye: For an extra touch of professionalism, apply edge paint or dye. This not only improves the look but also protects the edges from wear and tear.
Dyeing or Treating the Leather
If you want to add color to your sheath, leather dyes are available in a wide range of colors. Apply the dye evenly with a sponge or a wool dauber and let it dry completely. You might need to apply multiple coats to achieve the desired color.
Once you’re done, apply a leather conditioner and buff it out with a soft cloth for a natural shine. Leather conditioners and oils keep the leather supple and prevent it from drying out and cracking. Finally, apply a leather sealer or a waterproofing treatment to protect your sheath from moisture and environmental elements. This step is particularly important if the sheath will be used outdoors.
Attaching a Belt Loop (Optional)
For those who plan to carry their knife sheath on a belt, attaching a belt loop is a practical addition. Even if you're new to leatherworking, adding a belt loop is a straightforward process. Here’s how you can create and attach one, along with some alternative carrying options.
Creating a Belt Loop
First, cut a strip of leather for the loop. The width should be slightly wider than the belt you intend to use, and the length should be enough to form a loop and have excess for attaching to the sheath. Then soak the strip in water to make it pliable, then shape it around a cylindrical object that has a similar diameter to your belt, like a dowel or a spray can. Let it dry completely to hold its shape.
Pro Tip:If you want the loop to match your sheath, dye and finish it using the same methods you used for the sheath.
Attaching the Belt Loop
Decide where on the sheath you want the belt loop. (It’s usually placed towards the top of the sheath for balance.) Mark where you’ll attach the loop to the sheath. Punch stitching holes in both the sheath and the ends of the loop and then stitch the belt loop to the sheath using the same stitching method you used for the rest of the sheath. Ensure the stitches are tight and secure. For added strength, you can apply a small amount of leather glue under the loop where it attaches to the sheath.
Alternative Carrying Options
If a belt loop isn’t your preferred choice, or if you want more versatility, consider these alternatives:
- Dangler Attachment: A dangler allows the sheath to hang lower from the belt, providing more flexibility and ease of movement. You can attach a metal D-ring to the top of the sheath and then connect a leather loop to the ring.
- Clip Attachment: For a quick and easy attachment option, you can fix a metal clip to the back of the sheath. This allows you to clip the sheath onto a belt, a pocket, or a backpack strap.
- Neck Carry: For smaller knives, a neck carry option can be practical. Attach a strong cord or a leather thong to the top of the sheath so it can be worn around the neck.
Maintenance and Care
Leather, while durable, requires certain conditions to maintain its quality and appearance. Here are some tips on how to keep your leather sheath in top condition:
- Regularly wipe off dust and dirt from the sheath with a soft, dry cloth. This prevents buildup which can scratch or damage the leather over time.
- For spots or stains, use a slightly damp cloth with mild soap. Gently clean the area and then wipe it down with a dry cloth.
- Leather can dry out and lose its flexibility, so it's important to condition it periodically. Use a quality leather conditioner and apply it with a soft cloth in circular motions. This will keep the leather supple and prevent cracking.
- Don’t over-condition the leather; doing it a couple of times a year is usually sufficient.
- Leather is susceptible to water damage. If your sheath gets wet, dry it slowly at room temperature. Avoid direct heat sources like hair dryers, as they can cause the leather to harden or crack.
- If the sheath is frequently used in damp conditions, consider applying a waterproofing treatment to protect it. Store the sheath in a cool, dry place. High humidity can lead to mold growth, while too much dryness can cause the leather to crack. Avoid storing the sheath in direct sunlight, as prolonged exposure to UV rays can fade and weaken the leather. When not in use, make sure the sheath is not compressed or bent to maintain its shape.
Get Your Knife Making Tools At Red Label Abrasives
A well-made leather sheath is a blend of functionality, durability, and artistry. Whether you choose a classic pouch style or a more intricate Western design, your sheath will undoubtedly add a unique and personal touch to your knife.
Of course, a sheath remains empty without a good knife to put in it. Red Label Abrasives manufactures the abrasives you need to make better knives. Our knife making sanding belt kits provide all the essentials you need to bring your creative visions to life. If you have questions or would like to place an order, call 844-824-1956 or fill out our contact form today!


Belt Packs Made For Knife Makers

2 X 72 Inch Knife Makers Sanding Belts Assortment

2 X 60 Inch Knife Makers Sanding Belts Assortment

2 X 48 Inch Knife Makers Sanding Belts Assortment

2 X 36 Inch Knife Makers Sanding Belt Assortment

2 X 42 Inch Knife Makers Sanding Belts Assortment

1 X 30 Inch Knife Makers Sanding Belts Assortment

1 x 42 Inch Knife Makers Sanding Belt Assortment
Shop By Product Category


Why Choose Red Label?

