Your Cart is Empty


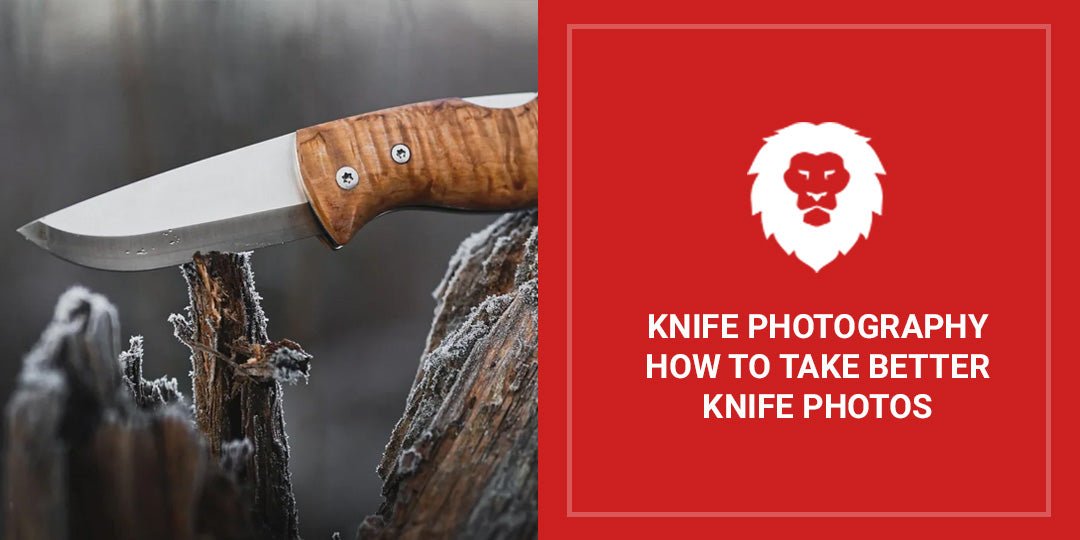
Knife Photography: How To Take Better Knife Photos

Quick Summary
Taking better knife photos means collecting the right equipment, such as DSLRs, macro lenses, and tripods. Other key aspects include choosing the right background, using appropriate lighting to avoid reflections, and positioning the knife to showcase its best features. Equally important is focusing on details, like the blade edge and handle texture, and post-processing for enhancing contrast, brightness, and sharpness. It’s also recommended that you prepare the knife by removing nicks and scratches and polishing it for the best photographic results.
Photography in general is an acquired skill, but when you’re taking pictures of knives, ability becomes even more important. Many knives have intricate detailing on the handles, and it can be tricky to photograph a gleaming blade without getting a glare that ruins the image.
The good news is that with the right tips, it’s actually pretty easy to capture stellar images. If you’re a knife maker wanting to display your artistry, a collector seeking to show off your collection, or a seller aiming for more revenue, great photographs can help you get there. In this blog, the team at Red Label Abrasives shows you how it’s done.
Understanding Knife Photography
The art of knife photography requires a special set of skills and techniques. One of the most striking aspects of knives is their intricate details, especially on the handles, which often feature elaborate designs, textures, and materials. Capturing these subtleties requires a keen eye and a solid understanding of lighting and angles. Unlike more forgiving subjects, the minute details on a knife's handle can make or break a photo.
Below are some additional considerations:
- Unlike matte objects, gleaming blades can easily reflect light, causing glares that can obscure details and ruin the aesthetic. To show off the blade's sharpness and finish, the photographer must manipulate light to minimize reflections.
- In knife photography, composition plays an important role. The background, the surface on which the knife rests, and the angle of the shot all contribute to this narrative. A well-composed photograph can elevate a simple knife to a symbol of quality craftsmanship.
- The technical aspects of knife photography, like aperture, shutter speed, and ISO settings, require precision. A shallow depth of field can highlight intricate handle designs, while a wider depth of field ensures that the entire knife is in focus.
If you’re new to knife photography, you’ll find that patience is just as important as creativity. It's a process of trial and error that requires you to experiment with different settings, lighting conditions, and compositions. Unless it’s mass-produced, every knife is different, and it's the photographer's job to bring that to life in a still image.
What Equipment Do You Need For Knife Photography?
As you start exploring knife photography, it becomes clear that having the right equipment is as important as your creative eye. In this section, we explain the key gear that will elevate your knife photographs from the every day to the remarkable.
Camera Selection: DSLR vs. Smartphone Cameras
Should you invest in a quality camera or can you stick with your smartphone? If you plan on taking a lot of photos, you might want to buy the former. While the newest smartphones are convenient and increasingly capable, a DSLR offers unparalleled control over technical aspects such as aperture, shutter speed, and ISO. This control is vital for capturing the fine details and textures of knives. The DSLR's larger sensor size also means better image quality, especially in lower light conditions, which can be crucial for highlighting the subtle details of your subject.
The Importance of a Good Lens for Close-Up Shots
For knife photography, a macro lens is indispensable. It allows you to get close enough to capture minute details without losing sharpness. This lens type is specifically designed for close-up photography and can make a significant difference in showcasing the intricate designs and craftsmanship of knives.
Using Tripods for Stability
Stability is key when capturing fine details. Handheld shots, while convenient, often lead to unwanted blurriness, especially in close-ups where even the slightest movement can have a big impact. A sturdy tripod provides the necessary stability, ensuring sharp, clear images. It also allows for more consistent framing, which is particularly useful when shooting multiple knives.
Lighting Equipment: Natural Light vs. Studio Lights
Lighting can make or break your knife photos. Natural light, with its soft, diffused qualities, can beautifully highlight the knife's features. However, it's not always reliable or consistent. Studio lights, on the other hand, offer control and consistency. They can be adjusted to eliminate unwanted shadows or glares, which are particularly challenging when photographing reflective surfaces like knife blades.
Light Boxes for Image Control
A light box is a controlled environment that offers even, diffused light, minimizing harsh shadows and glares. Light boxes are particularly useful for beginners, as they provide a simple yet effective setup for capturing high-quality images. They come in various sizes, allowing you to choose one that best fits the dimensions of your knives.
Setting Up Your Space
The space where you shoot plays a key role in the final quality of your images. Let's take a closer look at the best way to set up your photography space.
Choosing the Right Background and Surface
The background and surface should be chosen carefully to complement, not overpower, the knife. Opt for simple, neutral backgrounds that highlight the knife's features without causing distractions. Textures can add depth but avoid overly busy patterns. As for the surface, a matte finish is often preferable as it reduces glare, providing a clean and professional look.
Arranging Lighting to Avoid Reflections and Shadows
Lighting is crucial in knife photography, especially given the reflective nature of the blades. The goal is to illuminate the knife evenly while avoiding harsh reflections and shadows. Use diffused lighting to achieve a soft, even light across the knife. This can be accomplished with studio lights and softboxes, or even by natural light on an overcast day. Experiment with the positioning of lights until you find a setup that illuminates the details without unwanted glare.
Tips on Positioning the Knife
The way you position the knife is essential in showcasing its best features. Start by determining what aspect of the knife you want to highlight—be it the blade, handle, or overall design. Place the knife at an angle that captures this feature while maintaining a balanced composition. Avoid laying the knife flat, as this can make it difficult to capture its depth and details. Instead, prop it up slightly or use a stand to give it dimension.
Composition and Angles
In knife photography, the composition and choice of angles are key elements. Your photos will have a greater visual impact if you understand and apply these principles.
The Rule of Thirds
The rule of thirds is a classic composition technique in photography, and it applies effectively to knife photography as well. Imagine your frame divided into nine equal sections by two vertical and two horizontal lines. Placing the knife along these lines or at their intersections can create a more balanced, engaging, and visually pleasing image. This technique draws the viewer’s eye to the key elements of the knife, such as an intricately designed handle or a beautifully crafted blade.
Experimenting with Different Angles
Different angles can highlight various aspects of the knife and reveal its character. For instance, shooting from a low angle might emphasize the length and edge of a blade, while a top-down view could better display the details on the handle. Don't hesitate to experiment with various angles—side, top, even slightly tilted—to find the one that best showcases the knife’s features. Each angle offers a new perspective and can bring out different details in your subject.
Balancing the Knife Within the Frame
Balancing the knife within the frame is crucial for creating an appealing image. This doesn’t always mean centering the knife. Instead, consider how the knife interacts with the space around it. Leave enough space to avoid a cramped look, but not so much that the knife seems lost in the frame. The goal is to make the knife look like it naturally belongs in that space, creating a sense of equilibrium and focus.
Focus on Details
Capturing intricate details is essential in knife photography. Fortunately, macro photography allows you to capture these details with clarity and precision. Here are some techniques to get you started:
- Use a Macro Lens: A macro lens is specifically designed for close-up photography. It lets you get close to the subject while maintaining sharpness and detail.
- Stable Setup:Use a tripod to stabilize your camera. This prevents blurring and ensures sharp, clear images, especially important in macro photography.
- Manual Focus: Auto-focus can sometimes miss the fine details you want to highlight. Using manual focus gives you complete control to pinpoint exactly where you want the focus to be.
- Adequate Lighting: Ensure your subject is well-lit. Use diffused lighting to avoid harsh shadows and highlights that can obscure details.
The blade is often the most defining feature of a knife. Focus on the blade edge to capture its sharpness and shape. Pay attention to how the light reflects off the blade, highlighting its edge and surface. If the knife has engravings or embellishments, these details should be captured with precision. A clear focus on these elements can add depth to your photograph and showcase the artistry involved in the knife's design.
The same goes for the handle, which often contains intricate textures, materials, and designs. Focus closely on these areas to bring out patterns, materials like wood or metal, and any fine craftsmanship.
Post-Processing and Editing
After capturing your knife photos, post-processing and editing can refine and enhance the final images. Here, we'll discuss basic editing tips to improve your knife photos and how to use editing software effectively while keeping the edits realistic.
Enhancing Contrast, Brightness, and Sharpness
Adjusting the contrast, brightness, and sharpness are fundamental steps in photo editing:
- Contrast: Adjusting the contrast can make the knife stand out more against the background. Increase the contrast to deepen the shadows and brighten the highlights but avoid overdoing it, which can lead to unnatural-looking images.
- Brightness: Correct the brightness to ensure your photo accurately reflects the true colors and details of the knife. This can be particularly important if the lighting conditions were not ideal during the shoot.
- Sharpness: Increase the sharpness to bring out the fine details of the knife, especially the textures on the handle and the edge of the blade. Be cautious not to over-sharpen, as this can introduce unwanted visual noise and artifacts.
Using Editing Software to Correct Imperfections
Editing software can be a powerful tool in correcting imperfections that weren't addressed during the shoot. This can include removing dust spots, correcting slight color imbalances, or cropping the image for better composition. Software like Adobe Photoshop or Lightroom offers a range of tools for these corrections.
While editing can significantly improve a photo, it's important to keep the edits realistic. The goal is to represent the knife as accurately as possible. Over-editing can misrepresent the product, especially if you're using the photos for selling purposes. Avoid altering the fundamental aspects of the knife, such as its color and shape. The edits should enhance the photo while maintaining the authenticity of the knife's appearance.
Inspiration and Creative Ideas
Using creative ideas in knife photography can add a distinctive flair to your images and make them stand out.
Experiment with Themes
Consider incorporating different themes into your knife photography. For instance, a rustic theme can be achieved by using natural elements like wood or stone as backgrounds. For a more modern look, opt for sleek, monochromatic surfaces. Themes can also be seasonal, like using autumn leaves or snowy backdrops, depending on the time of year.
Play with Colors and Textures
Colors and textures can dramatically change the mood of your photographs. Pairing your knife with contrasting colors can make it pop, while complementary colors can create a harmonious and pleasing appearance. Textured surfaces like coarse fabrics or patterned materials can add depth and interest to your photographs.
Use Props
Props can add great context. For example, placing a chef's knife next to fresh ingredients can suggest its use in cooking. Historical or cultural knives might be paired with relevant artifacts or fabrics. Be mindful that the props should support, not overshadow, the knife itself.
Incorporate Human Elements
Introducing human elements, like a hand holding the knife, can give a sense of scale and show the knife in use. This can make the photograph more relatable and engaging, especially for viewers who might be potential users of the knife.
Experiment with Angles and Perspectives
Don't be afraid to try unconventional angles or perspectives. Overhead shots, close-ups, and angled views can all tell different stories about the knife. Each angle offers a new way to showcase the knife's design and features.
How to Get Your Knives Camera Ready
Ensure your knife looks its best by addressing any nicks, scratches, or dull areas before taking a photograph.
Start by examining the knife under good lighting to identify all the imperfections. This will help you understand the extent of damage and the required level of repair. Then clean the blade thoroughly. Use a mild soap and water solution to remove any dirt or grime. Dry it completely with a soft cloth to avoid water spots.
If your examination detects nicks or scratches, use a fine-grit sanding sheet or a honing stone to gently sand the affected area. Sand in the direction of the grain to avoid creating additional scratches. You can also use a polishing compound with a soft cloth for minor surface scratches- rub the compound in a circular motion over the scratches until they diminish. If the blade is dull, use a knife sharpener or a whetstone to restore its edge. Follow the sharpener's instructions or use the whetstone at the correct angle to sharpen the blade evenly.
After removing nicks and sharpening the blade, give your knife a final polish. Use a microfiber cloth and a metal polish suitable for knives. Apply the polish in small circular motions, then wipe off any excess with a clean part of the cloth.
Once you’re done, inspect the knife again under good lighting. If any imperfections remain, repeat the relevant steps. Sometimes, a second round of light sanding or polishing is needed to achieve the desired finish.
Stock Up On Knife Making Abrasives At Red Label Abrasives
Remember: great knife photography is not just about technical skills; it's also about creativity and experimentation. Don't hesitate to try new approaches, play with different themes, and explore various angles and perspectives. Each knife has its own story to tell, and your photography can bring that story to life in a way that resonates with your audience.
For those of you who are knife makers, remember that the quality of your materials plays a significant role in the final product. At Red Label Abrasives, we understand the importance of using top-notch materials in knife making. We invite you to explore our selection of abrasives and knife making sanding belt kits to ensure that your creations not only look incredible in photographs but also meet the highest standards of quality and craftsmanship. If you have questions or would like to place an order, call 844-824-1956 or fill out our contact form today!


Belt Packs Made For Knife Makers

2 X 72 Inch Knife Makers Sanding Belts Assortment

2 X 60 Inch Knife Makers Sanding Belts Assortment

2 X 48 Inch Knife Makers Sanding Belts Assortment

2 X 36 Inch Knife Makers Sanding Belt Assortment

2 X 42 Inch Knife Makers Sanding Belts Assortment

1 X 30 Inch Knife Makers Sanding Belts Assortment

1 x 42 Inch Knife Makers Sanding Belt Assortment
Shop By Product Category


Why Choose Red Label?

