Your Cart is Empty


How To Sharpen A Knife Without A Sharpener

Quick Summary
The ability to sharpen a knife without a sharpener is a valuable skill that can come in handy in various situations. There are several alternative methods for sharpening a knife, ranging from using a honing rod and a whetstone to unconventional options like a coffee mug. These methods, though not as traditional as using a dedicated sharpener, have proven to be resourceful and effective.
A sharp knife is one of the most important tools you can have, whether you’re in the kitchen, out in the workshop, or spending time outdoors. A properly sharpened blade cuts cleanly, requires less effort to get results, and dramatically reduces the chance of a slip-related injury. Unfortunately, even the best knives don’t stay sharp forever. Edges roll, steel fatigues, and over time, a once-crisp blade begins to feel sluggish and imprecise. That’s usually the moment you reach for your sharpener... unless, of course, one isn’t available.
Most people don't realize that many everyday objects can stand in for traditional sharpening tools when you’re in a pinch. Anything with the right abrasive qualities can realign or refine a knife’s edge: in fact, many of the same principles used with professional sharpening equipment apply to improvised tools as well. It’s all about maintaining your angle, using controlled strokes, and choosing the right surface for the level of dullness you’re dealing with.
While nothing replaces high-quality abrasives or a proper sharpening system, knowing how to restore a knife without them is an incredibly useful skill. Whether your sharpener is misplaced, you’re traveling, or you’re working in the field, the following methods can help you regain a functional edge. In this guide, the team at Red Label Abrasives walks you through several practical, real-world techniques that can bring a dull knife back to life, even when traditional tools aren’t within reach.
How To Tell If Your Knife Is Actually Dull
Before choosing a sharpening method, you’ll want to determine whether your knife truly needs sharpening or simply needs a quick hone. A knife can look fine at a glance yet still perform poorly because the edge has rolled, flattened, or developed micro-burrs. Below are several simple, reliable tests you can perform at home: no special tools required.
The Paper Test
One of the most common ways to evaluate sharpness is with a sheet of printer paper. Hold the paper upright and gently push the blade into the edge. A sharp knife should slice cleanly through without snagging or tearing. If the blade struggles to bite in, drags through the cut, or crumples the paper instead of slicing, the edge has likely dulled and needs more than a quick hone.
The Tomato or Soft Produce Test
Soft-skinned produce, such as tomatoes, onions, or peaches, reveals dullness quickly. A sharp knife should pierce the skin with little to no downward pressure. If the blade slips, slides off the surface, or requires sawing motion just to break the skin, the edge has lost its bite. This is a telltale sign that sharpening (not just honing_ is needed.
The Fingernail Test (Use With Caution)
With a light touch, rest the edge of the blade on your thumbnail at a slight angle. A sharp knife will “grab” and stay in place. A dull blade will slide across the nail without catching. This test should be performed carefully to avoid injury, but it provides quick feedback on whether the edge is still crisp or has begun to round over.
The Light Reflection Test
A properly sharpened edge is so thin that it won’t reflect light. Hold the knife under a bright light and slowly rotate it. If you see shiny spots along the edge, those are flat or damaged areas that need correcting. This method is especially useful for detecting micro-rolls that aren’t always obvious during cutting tasks.
Real-World Utility Test
Sometimes the simplest test is paying attention to how the knife behaves during normal use. If the blade crushes herbs instead of slicing them, struggles to cut through protein, or has difficulty gliding through vegetables, dullness is the likely culprit. Similarly, outdoor or utility knives will start to bind, skip, or require noticeably more force to cut rope, wood, or packaging.
Recognizing the early signs of dullness helps you maintain your knives more effectively and prevents unnecessary wear over time. Once you’ve confirmed that your blade needs attention, you can choose the method that best matches your tools and your environment, even if that means sharpening without a traditional sharpener.
Method 1: Using a Honing Rod
Just to set the record straight, honing and sharpening are not the same thing, but honing a knife can make the knife feel sharper. A honing rod, also known as sharpening steel, is a long, cylindrical rod made of steel or ceramic. Rather than sharpening the knife by removing material, it straightens and realigns its edge. This process, known as honing, helps restore the knife's sharpness and improves its cutting performance. Honing is particularly effective for maintaining the edge between sharpenings.
To hone a knife using a honing rod, follow these steps:
- Choose the Right Angle:Hold the honing rod vertically, pointing it downward. Maintain a consistent angle of approximately 15-20 degrees between the blade and the rod. This angle will depend on the knife's edge angle, so it's important to match it as closely as possible.
- Get a Firm Grip:Hold the handle of the knife firmly with one hand and grasp the honing rod's handle with the other. Make sure you have a secure and comfortable grip on both the knife and the rod to ensure safety and control.
- Position the Knife on the Rod: Starting at the base of the blade, position the knife's heel against the top of the rod near the handle. Ensure that the entire length of the blade is in contact with the rod, maintaining the desired angle.
- Glide the Knife Along the Rod: Applying light pressure and using a smooth motion, slide the knife down the length of the rod while maintaining a consistent angle. Start at the base of the blade and work toward the tip. Repeat this motion several times, alternating sides of the blade for even honing.
- Check for Alignment:After each stroke, inspect the edge of the blade to ensure it is straight and aligned. This realignment process will help restore the sharpness and improve the cutting performance of the knife.
Tips and Tricks for Effective Honing
- Prioritize Safety:Always exercise caution while honing a knife. Maintain a secure grip, watch your fingers, and be aware of the knife's position throughout the process.
- Use Light Pressure: Apply gentle pressure when gliding the knife along the honing rod. Excessive force may damage the blade or cause injuries.
- Practice Consistency:Maintain a steady angle and consistent pressure throughout the honing process. Consistency will yield better results and help maintain the knife's edge.
Honing should be a regular part of your knife maintenance routine. By honing regularly, you can prolong the time between actual sharpenings and keep your knives performing at their best.
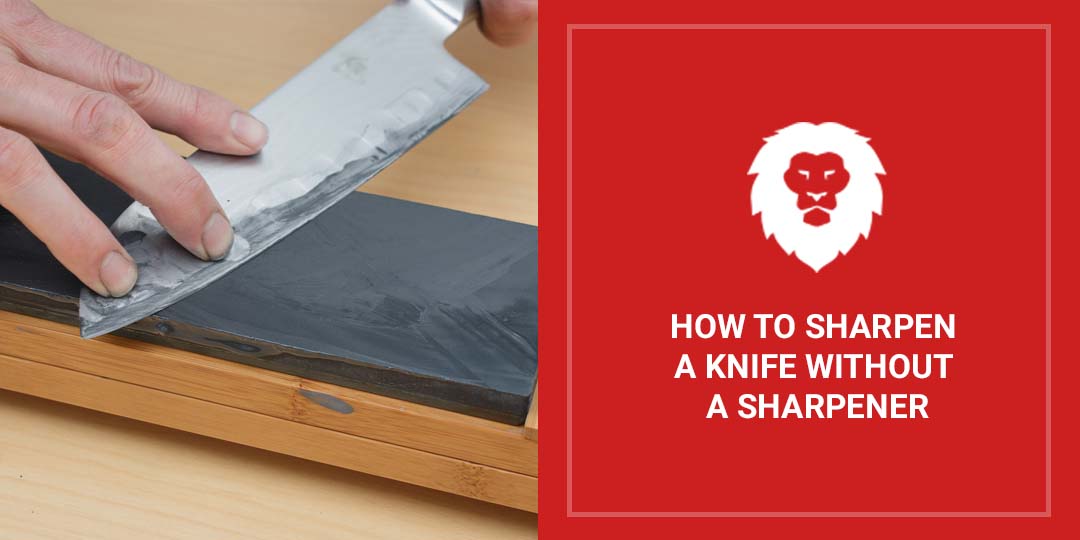
Method 2: Using a Whetstone
A whetstone, also known as a sharpening stone or water stone, is a traditional tool for sharpening knives and other cutting tools. These stones provide a versatile and effective sharpening method, allowing you to adjust the level of coarseness or fineness based on your specific needs. The use of water during the sharpening process helps keep the stone clean and prevents heat from building up, ensuring optimal results.
Here’s how to sharpen your knife using a whetstone:
- Prepare the Whetstone: Place the whetstone on a stable surface and, if necessary, wet it with water according to the manufacturer's instructions. Some whetstones require soaking beforehand, while others only need a few minutes of moistening.
- Determine the Knife's Edge Angle:Identify the existing edge angle of your knife. This angle will determine how you position the knife on the whetstone during sharpening. Most kitchen knives have a bevel angle of around 15-20 degrees per side.
- Position the Knife on the Whetstone: Hold the knife's handle firmly with one hand and place the blade against the whetstone at the desired angle. Maintain a consistent angle throughout the sharpening process.
- Begin Sharpening:Starting at the base of the blade, apply gentle pressure and slide the knife across the whetstone, moving from the heel to the tip. Maintain a smooth and controlled motion as you repeat this process several times on each side of the blade.
- Alternate Sides:To achieve an even edge, alternate sharpening strokes on each side of the blade. This ensures both sides of the knife receive equal attention and promotes a balanced edge.
- Check for Burrs: After several sharpening strokes, assess the edge for any burrs or rough spots. Burrs are small metal particles that can accumulate on the blade during sharpening. To remove them, lightly run the knife along the stone's edge at a slightly steeper angle than the sharpening angle.
Tips and Tricks for Effective Whetstone Sharpening
- Choose the Right Grit: Whetstones are available in various grit levels, each suitable for different stages of sharpening. Coarse grits (lower numbers) are ideal for repairing damaged or dull blades, while finer grits (higher numbers) are used for honing and refining the edge.
- Maintain Consistency:Throughout the sharpening process, maintain a consistent angle and apply even pressure to the blade. This consistency ensures an even and uniform edge across the entire length of the knife.
- Lubrication and Cleaning: Keep the whetstone lubricated with water or honing oil, following the manufacturer's recommendations. Additionally, periodically clean the stone to remove metal particles and debris, maintaining its effectiveness.
Sharpening with a whetstone requires practice to develop the right technique. Take your time, be patient, and focus on achieving a consistent and sharp edge. Over time, you'll refine your skills and achieve excellent results.
Method 3: Using a Coffee Mug
When you find yourself without traditional sharpening tools, you may be surprised to know that a simple coffee mug can serve as a makeshift sharpener. This unconventional method allows you to quickly restore some sharpness to your knife's edge.
Here are some step-by-step instructions:
- Choose the Right Mug:Select a ceramic or porcelain coffee mug with an unglazed, rough bottom. The rough surface of the mug will act as an abrasive to sharpen the knife.
- Flip the Mug Upside Down:Turn the coffee mug upside down so that the bottom, typically the flat part, faces upwards. Ensure that the mug is placed on a stable surface to prevent it from sliding.
- Grip the Knife Handle: Hold the knife firmly by its handle, ensuring a secure grip throughout the sharpening process.
- Position the Knife on the Mug: With the blade facing away from you and the cutting edge touching the rough bottom of the mug, angle the knife at approximately 20 degrees. Maintain this angle consistently throughout the sharpening process.
- Slide the Knife Back and Forth:Applying light pressure, slide the knife blade along the rough surface of the mug in a back-and-forth motion. Start from the base of the blade and work your way toward the tip. Repeat this motion several times, evenly sharpening both sides of the knife.
- Check the Sharpness:After each stroke, check the knife's sharpness by gently running your fingertip along the edge. Be cautious and use light pressure to avoid any accidental cuts. Continue sharpening until you achieve the desired level of sharpness.
Tips and Tricks for Effective Sharpening With a Coffee Mug
- Maintain a Consistent Angle: Throughout the sharpening process, it's crucial to maintain a consistent angle of approximately 20 degrees. This helps ensure an even sharpening of the blade.
- Apply Light Pressure: While sliding the knife on the rough surface of the mug, apply gentle pressure. Applying excessive force may damage the knife or cause it to slip, leading to accidents.
- Test the Sharpness: Regularly check the sharpness of the blade with your fingertip. Be cautious and use light pressure during the testing to avoid injury. Continue sharpening until you achieve the desired level of sharpness.
While using a coffee mug can temporarily sharpen your knife, it is not a substitute for proper sharpening techniques with dedicated tools. Plan to invest in professional sharpening or acquire suitable sharpening tools for long-term knife maintenance.
Method 4: Using Sandpaper
Sandpaper, commonly used for smoothing and shaping surfaces, can also serve as an alternative sharpening tool for your knife. It provides an abrasive surface that can effectively remove material from the blade, resulting in a sharper edge.
To sharpen your knife with sandpaper, follow the steps below:
- Select the Right Sandpaper:Choose sandpaper with a grit suitable for sharpening knives. For initial sharpening or reprofiling, start with a coarser grit, such as 220 or 400. For refining and honing the edge, use finer grits like 1000 or 2000. It's recommended to have multiple grits available for different stages of sharpening. There are also certain abrasive grains that work better than others. We recommend silicon carbide sanding sheets for knife sharpening.
- Attach Sandpaper to a Flat Surface:Securely attach the sandpaper to a flat and stable surface, such as a wooden block or a flat workbench. Ensure the sandpaper is taut and free from any wrinkles or folds that could affect the sharpening process.
- Position the Knife on the Sandpaper:Hold the knife firmly by the handle and position the blade against the sandpaper at the desired sharpening angle. Maintain a consistent angle throughout the sharpening process. Start with the coarsest grit if you're reshaping the blade or refining the edge.
- Apply Consistent Pressure:Apply light to moderate pressure on the blade as you move it across the sandpaper. Start from the base of the blade and glide it smoothly toward the tip in a sweeping motion. Ensure even contact between the edge and the sandpaper throughout each stroke.
- Alternate Sides and Change Grits:After several strokes on one side, switch to the other side of the blade to maintain an even edge. As you progress, you may move to finer grits for honing and refining the edge. Remember to clean the blade and sandpaper between grit changes to avoid transferring debris.
- Test the Sharpness:Regularly check the sharpness of the blade using a piece of paper or by gently running your fingertip across the edge. Be cautious and use light pressure during the testing to avoid accidental cuts. Continue sharpening until you achieve the desired level of sharpness.
Tips and Tricks for Using Sandpaper Effectively
- Take Safety Precautions: To protect your hands, consider wearing cut-resistant gloves while sharpening with sandpaper. Pay attention to your fingers and maintain control of the knife to prevent accidents.
- Progress Gradually: Start with a coarser grit to reshape or repair the blade, then gradually move to finer grits for honing and refining the edge. This progressive approach ensures better results and avoids excessive material removal.
- Maintain Consistent Angle and Pressure:Throughout the sharpening process, maintain a consistent sharpening angle and apply even pressure on the blade. This consistency ensures an even and uniform sharpening of the edge.
- Clean and Dry the Blade:After sharpening, clean the blade thoroughly with water or a damp cloth to remove any residual grit or debris. Dry the blade completely to prevent corrosion or rust formation.
Using sandpaper as an alternative sharpening tool can be effective when traditional sharpening methods or tools are not available. However, it may require practice to achieve optimal results. Remember to prioritize safety, choose the appropriate sandpaper grits, and maintain consistent technique and angle. With proper care and technique, sandpaper can help restore a sharp edge to your knife.
Method 5: Using a Car Window
If you ever find yourself outdoors or on the road without access to sharpening tools, a partially rolled-down car window can serve as an improvised sharpener. Most vehicle windows have a slightly rough, unpolished edge along the top. This surface is similar in texture to the unglazed bottom of a coffee mug and can provide just enough abrasion to refine a dull edge. While this method won’t produce a mirror-polished blade, it can restore enough sharpness for basic cutting tasks until you can perform a proper sharpening.
Follow these steps for effective sharpening:
- Lower the Window:Roll the car window down a few inches so the very top edge is exposed. Ensure the surface is clean and free of dirt, which could scratch or gouge the blade.
- Set Your Angle:Hold the knife at roughly 15–20 degrees, similar to how you would position it on a whetstone or honing rod. Maintaining a consistent angle is key to restoring a functional edge.
- Draw the Blade Smoothly Across the Edge:Place the heel of the knife against the top of the window and draw it down and toward you in a single, controlled motion. Use light pressure and keep the angle steady throughout the stroke. Repeat this process 6–10 times, then switch to the other side of the blade to ensure an even edge.
- Alternate Sides for Balance:Just like other sharpening methods, you should work both sides of the knife evenly. Unequal sharpening can result in a lopsided edge that feels sharp on one side and dull on the other.
- Check Your Progress:After several passes, carefully test the edge on paper or soft produce or simply observe how easily it catches on your thumbnail. If the blade still feels dull, repeat the process with gentle strokes until you reach the desired sharpness.
Tips and Tricks for Effective Sharpening With a Car Window
- Clean the Window Edge First:Any dirt or grit on the glass can scratch the blade or cause inconsistent sharpening. A quick wipe with a cloth makes a noticeable difference.
- Use Light, Controlled Pressure:The abrasive surface of tempered glass is finer than it looks. Gentle strokes prevent slipping and provide better results than heavy-handed pressure.
- Maintain a Steady Angle:Just like with whetstones or sandpaper, angle consistency determines how sharp your knife will get. If needed, mentally “lock in” the angle before each stroke.
- Sharpen Away From the Car Body:Always position the knife so the edge moves away from the vehicle. This avoids accidental cuts to upholstery, weather stripping, or paint.
- Limit This Method for Emergency Use:While surprisingly effective, the car window method shouldn’t replace routine sharpening with proper abrasives. Use it as a temporary solution until you can perform a more thorough sharpening.
A car window won’t give you the polished, precise edge of a whetstone or high-quality abrasive. However, it provides a surprisingly effective temporary solution when you need a sharper knife and have no tools on hand. The result is comparable to a medium-grit touch-up: sharp enough for slicing food, cutting rope, or performing basic outdoor tasks until proper maintenance can be done.
Method 6: Using Natural Stones Found Outdoors
When you're camping, hiking, or working in the field, you may not have access to any sharpening tools at all. In these situations, nature itself can provide an alternative. Many natural stones, especially those found near rivers, lakes, or forested areas, have a fine enough grit to remove metal and restore a usable edge. While this method requires a bit more observation and patience, it can improve a dull blade when more traditional options are unavailable.
Not all rocks are suitable for sharpening. You'll get the best results from stones with a smooth but slightly abrasive surface. Look for:
- Fine-Grained River Stones: These are naturally smoothed by water flow and provide a consistent, moderate abrasive surface.
- Slate or Shale Pieces:These rocks are often flat and smooth, making them easy to work with.
- Sandstone (Fine-Grit Only):Coarser varieties can be too aggressive, but fine sandstone can be effective for basic sharpening.
The more level the surface, the more control you’ll have. Avoid stones with large grains, cracks, or rough, jagged textures, as these can damage the knife’s edge.
Here’s how to sharpen a knife using a natural stone:
- Find a Flat, Smooth Surface:Choose a stone that’s large enough to support the blade and flat enough to keep your sharpening angle consistent. Riverbanks and creek beds are excellent places to search.
- Lubricate With Water:Like a whetstone, natural stones benefit from lubrication. Splash water onto the surface to help reduce friction, lift debris, and maintain smoother strokes.
- Set Your Angle:Hold the knife at roughly a 15–20 degree angle. This angle works well for most kitchen and outdoor knives. Keeping a consistent angle is crucial to producing an even, functional edge.
- Use Long, Controlled Strokes:Starting from the base of the blade, slide the knife across the stone in a sweeping motion toward the tip. Apply light, steady pressure and maintain your angle. Repeat this motion several times before switching sides.
- Alternate Sides to Balance the Edge:To avoid creating an uneven or asymmetrical bevel, sharpen both sides of the knife equally. Alternate strokes or do a set number on one side before switching to the other.
- Check for Burr Formation:After several passes, feel gently along the edge (away from the blade) to check for a small burr. A burr indicates you've reached the apex of the edge. Once detected, switch sides or lighten your pressure to refine and remove it.
Tips and Tricks for Sharpening With Natural Stones
- Choose Finer Stones When Possible:A smoother stone offers better control and reduces the risk of over-grinding the blade. Coarse rocks should only be used if no finer options are available.
- Let the Water Do Some of the Work:Keeping the stone wet helps suspend metal particles and prevents the surface from clogging. If you're near a water source, reapply water frequently.
- Stabilize the Stone:If the stone wobbles or shifts, place it against a larger rock, embed it into soft ground, or brace it with your free hand, keeping fingers well away from the blade.
- Use Gentle Pressure:Natural stones can be unpredictable. Using light pressure minimizes the risk of chipping or unevenly grinding the edge.
- Finish With a Polishing Surface if Available:If you can find a smoother rock nearby, such as polished river pebbles, use it as a final honing step to refine the edge.
While natural stones can produce a surprisingly effective edge, they won’t match the consistency of manufactured abrasives. Plan to follow up with proper sharpening when you return home.
Quick Comparison Guide
|
Method |
Best For |
Metal Removal |
Skill Level |
Edge Quality |
Pros |
Cons |
|
Honing Rod |
Routine maintenance between sharpenings |
Very Low |
Low |
Restores sharpness feel but not a new edge |
Quick, safe, easy, preserves blade life |
Won’t fix a truly dull blade |
|
Whetstone |
Full sharpening and repair |
Moderate to High |
Medium to High |
Very sharp, highly controlled |
Precise results, customizable grits, works on most knives |
Requires practice and consistency |
|
Coffee Mug (Unglazed Bottom) |
Emergency or occasional sharpening |
Low to Moderate |
Low |
Functional sharpness |
Easily accessible, inexpensive, works surprisingly well |
Not ideal for long-term maintenance; inconsistent |
|
Sandpaper (Silicon Carbide Recommended) |
Versatile sharpening and field use |
Low to High (depends on grit) |
Low to Medium |
Very sharp with fine grits |
Highly adaptable, inexpensive, multiple grit options |
Requires flat surface; can wear quickly |
|
Car Window (Top Edge) |
Outdoor or on-the-road emergency sharpening |
Low |
Low |
Serviceable, usable edge |
Readily available in the field, safe with light pressure |
Limited refinement; temporary solution |
|
Natural Stones Found Outdoors |
Outdoor survival and field maintenance |
Low to Moderate |
Medium |
Variable results depending on stone |
Good for wilderness situations; reliable if no tools available |
Results vary; harder to control consistency |
|
Belt Grinder (Ceramic or Zirconia Belts) |
Heavy reprofiling or professional sharpening |
Very High |
High |
Extremely sharp, durable edge |
Fast, efficient, ideal for knife making |
Can overheat blades; requires experience |
Knife Sharpening Angles Explained
The sharpening angle is the angle formed between the blade’s edge and the sharpening surface. A lower angle creates a thinner, razor-sharp edge, while a higher angle produces a stronger, more durable one. Choosing the right angle depends on how you use your knife and what kind of steel it’s made from.
Common Sharpening Angles and Their Uses
- 10–15 Degrees Per Side:These ultra-low angles are normally found on specialty Japanese knives, straight razors, and blades meant for extremely fine slicing. They deliver exceptional sharpness but are more fragile and prone to rolling if used on hard foods or tough materials.
- 15–20 Degrees Per Side:This range is the most common for everyday kitchen knives. It provides a balance between sharpness and durability, making it ideal for slicing vegetables, proteins, and general food prep. Most Western-style chef’s knives, utility knives, and paring knives fall within this angle range.
- 20–25 Degrees Per Side:Heavier-duty knives, such as outdoor, survival, and hunting knives, use a slightly wider angle. This helps the edge withstand impact, wood processing, rope cutting, and other demanding tasks where a stronger bevel is more important than cutting precision.
- 25–30 Degrees Per Side:This is the realm of axes, machetes, and heavy chopping tools. These angles produce thick, strong edges designed for striking and splitting rather than fine slicing.
How to Maintain the Correct Angle Without a Guide
Sharpening without a dedicated tool means you have to estimate and maintain the angles manually. Here are a few simple techniques:
- Use the “Two Coins” Rule:Stack two coins under the spine of the blade while it’s resting on a sharpening surface. This typically gives you an angle close to 15–20 degrees.
- Visualize Half and Half Again:A 90-degree angle is straight up, and half of that is 45 degrees. Half again gives you around 22 degrees. One more slight drop gets you close to 15 degrees.
- Lock Your Wrist:Most angle inconsistency comes from wrist movement. Lock your wrist in position and move the entire arm during each sharpening stroke to stay steady.
- Feel for the Burr:If you’re maintaining the correct angle, you’ll eventually form a burr along the opposite side of the blade. This tactile cue helps you know that you're removing metal exactly where you should be.
When sharpening without a traditional sharpener, maintaining your intended angle becomes even more important. Since improvised surfaces vary in texture and stability, a consistent angle helps ensure you get a clean, even edge regardless of the method used.
What is the Best Sandpaper for Sharpening Knives?
Ceramic, silicon carbide, and zirconia grains are considered the best options for sharpening knives due to their unique abrasive characteristics. They include:
- Hardness:Ceramic and zirconia are extremely hard materials, making them highly effective at removing material from the blade during sharpening. Their hardness ensures efficient sharpening and faster material removal compared to other types of sandpaper.
- Durability:Ceramic and zirconia are known for their exceptional durability. They can withstand the rigors of sharpening without quickly wearing down, allowing for prolonged and effective use. This durability makes them a cost-effective choice in the long run.
- Abrasive Performance:The abrasive particles in ceramic and zirconia sandpaper have a sharp and aggressive cutting action. They provide excellent cutting power, enabling them to effectively sharpen even tough and high-carbon steel blades. The abrasive performance of these sandpapers ensures efficient material removal and precise sharpening.
- Heat Resistance: Ceramic and zirconia sandpaper have good heat resistance properties, which are crucial during the sharpening process. As friction is generated between the sandpaper and the blade, heat can build up. The heat resistance of these materials helps prevent damage to the sandpaper and maintains its abrasive effectiveness.
If you have access to a belt grinder, you can use ceramic or zirconia sanding belts. You can browse our full selection of knife sharpening belts offered in a variety of different sizes. We don’t manufacture sanding sheets with ceramic or zirconia, because they’re premium grains. If you need sanding sheets, then silicon carbide sanding sheets are the way to go.
It’s important to note that the appropriate grit size should be selected based on the specific sharpening needs. Coarser grits are typically used for initial sharpening or reprofiling, while finer grits are employed for refining and honing the edge. Regular maintenance and cleaning of the sandpaper during use will ensure optimal sharpening performance.
Find Complete Knife Making Kits at Red Label Abrasives
The ability to sharpen a knife without a sharpener can come in handy in various situations. Regardless of the method chosen, it is crucial to prioritize safety throughout the sharpening process. Maintain proper grip and control over the knife, pay attention to angles and pressure, and always exercise caution to prevent accidents or injuries. With practice, you can keep your knives in optimal cutting condition, enhancing both your culinary experiences and outdoor adventures.
To maximize convenience, Red Label Abrasives manufactures complete knife-making kits in various sizes, ranging from 1 x 30 to 2 x 72. These packages include a range of grits, allowing users to achieve optimal results from initial sharpening to refining and honing the knife's edge. If you have questions or would like to place an order, call 844-824-1956 or fill out our contact form today!


Belt Packs Made For Knife Makers

2 X 72 Inch Knife Makers Sanding Belts Assortment

2 X 60 Inch Knife Makers Sanding Belts Assortment

2 X 48 Inch Knife Makers Sanding Belts Assortment

2 X 36 Inch Knife Makers Sanding Belt Assortment

2 X 42 Inch Knife Makers Sanding Belts Assortment

1 X 30 Inch Knife Makers Sanding Belts Assortment

1 x 42 Inch Knife Makers Sanding Belt Assortment
Shop By Product Category


Why Choose Red Label?

