Your Cart is Empty



Key Takeaways
Sandpaper is one of the most commonly used tools, with professionals and hobbyists alike including it in their workshops. It consists of abrasive grains bonded to a backing and plays an important role in shaping, smoothing, and finishing wood, metal, plastic, and other materials. Common applications include:
When you’re selecting sandpaper for a particular project, you want to make sure you’ve got the right grit for the job. The correct choice helps you remove material efficiently, achieve smoother finishes, and avoid common mistakes like gouging and oversanding. In this blog, the abrasive technicians at Red Label Abrasives explain what the different grit sizes mean and how to choose the right one for your project.
When you pick up a sheet, belt, or disc of sandpaper, one of the first things you'll notice is the printed grit rating. That number identifies the size of the abrasive grains attached to the backing and indicates how aggressively the product will cut. Knowing how these ratings work helps you select the best option for your project and produce a cleaner finish.
Each range serves a different purpose, so matching the rating to the job produces better results and saves time.
In the United States, the Coated Abrasive Manufacturers Institute (CAMI) scale is commonly used to measure sandpaper grit. This is what you’ll typically find in local hardware stores and lumber yards. However, there is another scale known as the Federation of European Producers of Abrasives (FEPA) scale, which also happens to be the one used by Red Label Abrasives.
The FEPA scale, identified by a "P" before the grit number (e.g., P220), is recognized for its strict tolerance system, which requires manufacturers to meet certain standards to qualify for grit ratings. FEPA grit sizes range from P8, which is very coarse, up to P1200 and beyond, which are extremely fine.
Manufacturers sort abrasive grains by size before bonding them to the backing material. During production, the grains pass through standardized sieves that separate them into uniform size ranges. Larger grains remain in coarser classifications, while smaller grains pass through finer screens and receive higher numerical ratings.
These standardized grading systems allow you to compare products with predictable cutting performance. For example, a P80 sandpaper uses much larger grains than a P220 product, so it removes stock more quickly but leaves deeper scratches. A P320 abrasive cuts more slowly while producing a finer finish that requires less preparation before painting, staining, or polishing.
It's also important to remember that a higher rating doesn't indicate better quality. Instead, it indicates a finer abrasive grain size. The best choice depends on the material you're sanding and your intended finish. Starting with a rating that's too coarse can leave scratches that need additional sanding, while beginning with one that's too fine can slow your progress and make stock removal unnecessarily time-consuming.
Selecting the appropriate grit improves the speed of your work, the appearance of the finished piece, and the amount of sanding necessary before you move to the next stage. Each abrasive rating serves a different purpose, so using the right one at the right time helps you produce cleaner results while avoiding unnecessary effort.
When your project calls for aggressive cutting, a coarse abrasive is the best starting point. Larger abrasive grains remove stock quickly, making them well-suited for stripping paint and varnish, removing rust, flattening uneven lumber, shaping hardwood, grinding welds, and establishing knife bevels. Beginning with an abrasive that's appropriate for the amount of stock you need to remove reduces the time spent on the initial sanding stage.
By comparison, finer abrasives are intended for refinement rather than heavy cutting. Using them too early in a project slows your progress and causes the abrasive to wear more quickly without producing better results.
Every sanding stage leaves a scratch pattern behind. Coarser abrasives create deeper scratches that must be refined before applying paint, stain, clear coats, or polishing compounds. As you progress to finer ratings, each abrasive removes the scratches left by the previous one, producing a cleaner and more uniform appearance.
The final sanding stage should also match the finish you're planning to apply. For example, wood that's being stained may need a different stopping point than a surface that's being painted or polished. Selecting the appropriate final rating helps prepare the material for the next stage without unnecessary sanding.
Starting with an abrasive that's too fine is one of the most common sanding mistakes. Smaller abrasive grains remove stock more slowly, so you'll spend considerably more time trying to accomplish work that a coarser product could complete much faster.
The opposite approach creates problems as well. Beginning with an abrasive that's too coarse for light sanding can leave deep scratches that need further grit changes to remove. Working through a logical grit progression reduces extra sanding, extends abrasive life, and produces a cleaner finish with fewer corrections.
Sandpaper ratings are grouped into ranges based on their cutting ability and the type of results they produce. Each range has a practical purpose, from aggressive stock removal to final polishing. Knowing when to use each one helps you choose the appropriate abrasive, reduce unnecessary sanding, and produce a better finished product.
Extra coarse abrasives are intended for demanding jobs that require rapid stock removal. Their large abrasive grains cut through material quickly, making them a good choice for stripping thick paint and coatings, removing heavy rust, leveling rough lumber, grinding welds, and reshaping hardwood or metal components.
These products leave deep scratch marks, so they're best suited for the earliest stage of a project. You'll typically switch to finer ratings afterward to refine the workpiece before applying paint, stain, polishing compounds, or another coating.
Coarse abrasives continue to remove stock aggressively while leaving a more controlled scratch pattern than extra coarse products. Typical applications include stripping varnish, removing mill marks, flattening uneven boards, shaping hardwood, cleaning corrosion from metal, and establishing knife bevels.
Many woodworking and metalworking projects begin within this range before moving to medium abrasives. Starting with the least aggressive rating that accomplishes the job reduces unnecessary sanding during later stages.
Medium abrasives remove the scratch marks left by coarser products while preparing the workpiece for its final sanding stages. This range is widely used for smoothing wood before staining or painting, removing light machining marks, refining metal components, and sharpening cutting tools.
Many woodworking projects finish within this range, depending on the wood species and the coating being applied. Choosing the appropriate stopping point helps produce the appearance you're trying to achieve without sanding longer than necessary.
Fine abrasives are intended for the last stages of surface preparation. Rather than removing large amounts of stock, they reduce the visibility of scratch marks left by earlier sanding and create a cleaner appearance before finishing.
This range is well-suited for preparing projects for paint, stain, clear coats, or polishing compounds. It's also widely used for sanding between coats of paint or varnish, producing satin metal finishes, refining knife blades, and preparing materials for final polishing.
Very fine abrasives remove very little material and are primarily used for refining and polishing. Typical applications include wet sanding automotive paint, polishing clear coats, sharpening cutting tools, refining decorative metalwork, and producing mirror-polished finishes.
At this stage, the goal is refinement rather than reshaping the workpiece. Each successive rating reduces the visibility of fine scratch marks, helping you achieve an exceptionally smooth appearance before the final polishing stage.
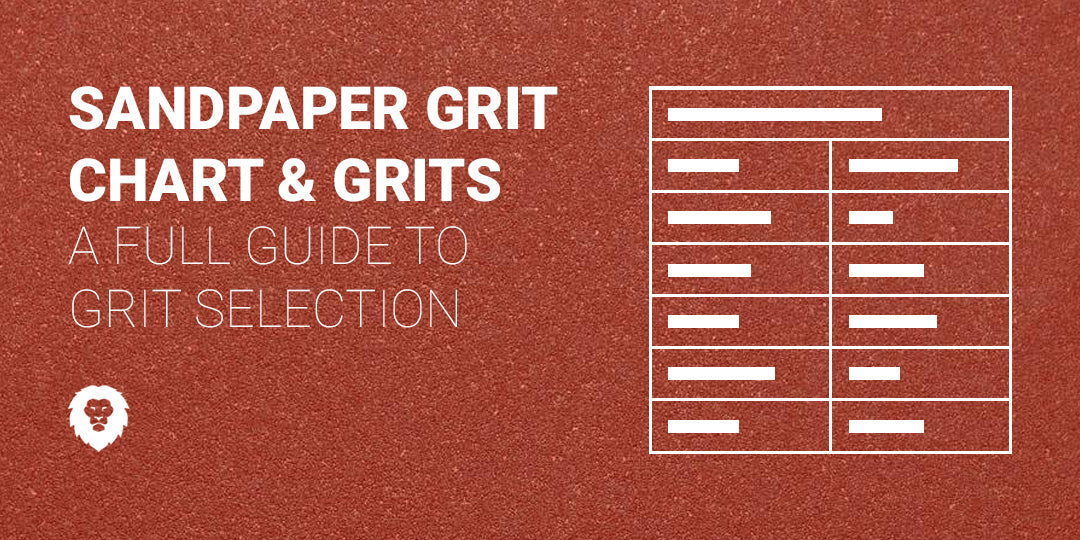
While grit ranges provide a helpful starting point, many sanding projects call for a more gradual progression. Moving through compatible grit ratings removes the scratch marks left by the previous abrasive and creates a cleaner finish with less extra sanding. The chart below summarizes common FEPA and CAMI grit ratings, their classifications, and the applications they're best suited for.
|
FEPA Grit |
Approximate CAMI Grit |
Category |
Typical Applications |
|
P8 |
8 |
Extra Coarse |
Heavy stock removal, stripping thick coatings, and removing heavy rust |
|
P12 |
12 |
Extra Coarse |
Grinding, weld cleanup, aggressive shaping |
|
P16 |
16 |
Extra Coarse |
Removing large amounts of wood or metal, surface leveling |
|
P24 |
24 |
Extra Coarse |
Paint removal, rough shaping, and establishing knife profiles |
|
P36 |
36 |
Coarse |
Heavy sanding, hardwood shaping, and weld blending |
|
P40 |
40 |
Coarse |
Removing finishes, flattening lumber, and rust removal |
|
P60 |
60 |
Coarse |
Surface leveling, shaping wood, and removing machining marks |
|
P80 |
80 |
Coarse |
Final rough sanding before moving to medium grits |
|
P100 |
100 |
Medium |
General surface preparation, removing coarse scratch marks |
|
P120 |
120 |
Medium |
Woodworking, metalworking, smoothing rough surfaces |
|
P150 |
150 |
Medium |
Preparing wood for paint or stain, refining metal |
|
P180 |
180 |
Medium |
Finish sanding softwoods and many hardwood projects |
|
P220 |
220 |
Medium |
Final preparation before many paints, primers, and finishes |
|
P240 |
Approximately 240 |
Fine |
Fine finish sanding, surface preparation before coatings |
|
P320 |
Approximately 320 |
Fine |
Sanding between coats of paint, varnish, or clear coat |
|
P400 |
Approximately 360 to 400 |
Fine |
Satin finishes, fine metal finishing, and paint preparation |
|
P600 |
Approximately 500 to 600 |
Very Fine |
Wet sanding, clear coat refinement, polishing preparation |
|
P800 |
Approximately 800 |
Very Fine |
Fine automotive finishing, polishing preparation |
|
P1000 |
Approximately 1,000 |
Very Fine |
Removing extremely light imperfections before polishing |
|
P1200 and Above |
Approximately 1,200 and Above |
Ultra Fine |
Mirror polishing, decorative metal finishing, and final sharpening |
The best starting point depends on your material and the amount of stock you need to remove. If you're stripping old paint, reshaping hardwood, or removing heavy rust, begin with an extra coarse or coarse abrasive before progressing through medium and fine ratings. For new woodworking projects that require only light smoothing, you may be able to begin with a medium abrasive and complete the job with fine sanding.
It's also important to avoid large jumps between grit ratings. For example, moving directly from P40 to P320 leaves deep scratch marks that finer abrasives remove very slowly. A gradual progression, such as P40, P80, P120, P180, and P220, produces a cleaner appearance while reducing unnecessary sanding.
Choosing the appropriate sandpaper starts with three questions: What are you sanding? How much stock needs to be removed? What will the finished piece look like when you're done? Answering those questions makes it easier to select a starting grit, build an efficient sanding sequence, and avoid extra work later.
Different materials respond differently to abrasion, so your starting point should reflect what you're working on. Softwoods, hardwoods, mild steel, stainless steel, aluminum, plastics, and glass each have different sanding requirements.
For example, removing saw marks from hardwood typically calls for a coarser abrasive than lightly preparing softwood for stain. Likewise, removing rust from steel requires a much different approach than refining aluminum before polishing. Matching the abrasive to the workpiece improves cutting speed and helps extend abrasive life.
The condition of the workpiece should guide your starting rating.
Your stopping point depends on the type of finish you're planning to apply. For example:
Choosing the appropriate final rating helps produce the appearance you're trying to achieve without unnecessary sanding.
One of the easiest ways to improve your results is to make gradual changes between abrasive ratings instead of jumping from a very coarse product to a very fine one. Each rating removes the scratch marks left by the previous abrasive, making the next stage faster and producing a cleaner appearance.
For example, if you're refinishing a hardwood tabletop, a sequence such as P40, P80, P120, P180, and P220 produces much better results than moving directly from P40 to P220. The intermediate ratings remove coarse scratch marks before the final sanding stage, leaving the surface ready for stain, paint, clear coat, or polishing.
The best grit for your project depends on the material, its condition, and the result you're trying to achieve. The recommendations below provide practical starting points for some of the most common woodworking, metalworking, knife making, sharpening, and automotive applications. You can adjust your grit sequence as needed based on the amount of stock that must be removed and the quality of the existing surface.
Most woodworking begins by removing saw marks, planer marks, or other imperfections before moving to finer grit ratings. Starting with the least aggressive abrasive that accomplishes the job helps reduce sanding time later.
Dense hardwoods generally require more cutting than softwoods. Beginning with an overly coarse abrasive on softwood can leave deep scratch marks that require additional sanding before finishing.
Old paint, varnish, lacquer, and polyurethane usually require coarse abrasives to cut through multiple coatings efficiently.
Once you've stripped the old coating, inspect the workpiece for dents, gouges, nail holes, or other defects. Making repairs before moving to finer grit ratings helps produce a cleaner final result.
Proper sanding plays a major role in how evenly wood accepts stain. Abrasives that are too coarse can leave visible scratch marks, while sanding to an excessively fine rating may reduce stain absorption on certain wood species.
Many staining projects finish between P180 and P220. Before applying stain, remove all sanding dust with a vacuum, tack cloth, or clean, lint-free cloth to help produce even color.
Metalworking applications range from aggressive stock removal to decorative finishing, so the appropriate grit varies with the job.
Stainless steel typically requires more cutting than aluminum or mild steel. Choosing an abrasive intended for metal applications also helps extend product life.
Knife makers typically use several abrasive ratings from the first grinding stage through final finishing.
The amount of corrosion determines your starting grit. Light surface rust can usually be cleaned with P80 or P120. Heavy corrosion typically requires P24, P36, or P40 before progressing to finer ratings. After removing the corrosion, continue sanding until the remaining scratch marks are suitable for primer, paint, or another protective coating.
Sandpaper is also a practical option for sharpening knives, chisels, scissors, plane irons, and other cutting tools.
Using several progressively finer ratings produces a cleaner cutting edge than relying on a single abrasive.
Automotive refinishing requires different grit ratings throughout the repair and painting sequence.
Always verify the grit recommendations provided by the paint, primer, or clear coat manufacturer before sanding. Following those recommendations helps promote proper adhesion and produce a cleaner finished appearance.
Even if you've selected the right grit and abrasive material, a few common mistakes can reduce the quality of your work and shorten the life of your sandpaper. Avoiding these issues helps you achieve cleaner results while getting more use from every belt, disc, or sheet.
Jumping from a coarse grit directly to a much finer one may seem like a time-saver, but it usually has the opposite effect. Fine sandpaper isn't intended to remove the deep scratch marks left by coarse grits, so you'll spend much longer trying to refine the surface.
For example, moving directly from P40 to P220 can leave scratches that remain visible after stain or paint is applied. A sequence such as P40, P80, P120, P180, and P220 removes those scratches gradually, reducing the amount of work required at each stage.
Beginning with a fine grit can make stock removal unnecessarily slow. If you're stripping old finishes, removing rust, or reshaping wood or metal, a fine abrasive removes too little material with each pass to work efficiently.
Choose the least aggressive grit that will complete the initial work in a reasonable amount of time. After the rough sanding is complete, progress through finer ratings to refine the scratch pattern before finishing.
Using the wrong abrasive mineral can shorten sandpaper life and slow your work. For example:
Matching the abrasive mineral to the material helps improve cutting speed and reduces unnecessary abrasive wear.
Pressing harder doesn't always remove material faster. Excessive force can generate heat, wear out the sandpaper sooner, and create uneven scratch patterns. On metal, excess heat may even discolor the workpiece, while wood can develop uneven sanding marks. Instead, let the sandpaper cut at its intended rate. Steady, even pressure produces a more uniform finish and helps your belts, discs, and sheets last longer.
When sanding wood by hand, working across the grain leaves scratches that become much more noticeable after a stain or a clear finish is applied. Whenever possible, sand in the same direction as the wood grain. This helps conceal sanding marks and creates a cleaner finished appearance.
Dust left behind after one sanding stage can become trapped beneath the next grit, creating fresh scratches that weren't there before. It can also interfere with paint, stain, primer, and clear coat adhesion.
Before switching to the next grit, clean the workpiece with a vacuum, compressed air, or a clean, lint-free cloth. Taking a few moments to remove sanding dust helps keep the surface clean throughout the entire sanding sequence.
Worn sandpaper removes stock much more slowly than fresh material. Continuing to use it increases sanding time and encourages many people to apply excessive force, which creates even more wear.
Inspect your belts, discs, and sheets regularly for glazing, clogging, torn backing, or worn abrasive grains. Replacing worn sandpaper at the right time improves cutting speed, leaves a cleaner scratch pattern, and helps you complete your project with fewer interruptions.
The key to achieving optimal results in any sanding project lies in understanding and selecting the appropriate sandpaper grit. The right grit size can make the difference between a project that looks professionally done and one that falls short of expectations. By starting with coarser grits for rapid material removal and progressing to finer grits for smoothing and finishing, you can ensure a high-quality finish on a wide range of materials.
At Red Label Abrasives, we manufacture industrial-grade abrasives that are engineered for the best results. This includes sanding belts, sanding discs, sanding sheets, and specialty abrasive products like knife-making kits. Our dedicated abrasive technicians can help you find the right abrasive and grits to finish your projects to perfection. You can speak with an abrasive technician by calling 844-824-1956 or filling out our contact form today.
If you're removing old paint, coarse grits typically provide the fastest results.
Once the old finish is gone, switch to progressively finer grits to remove scratch marks before applying primer, paint, stain, or another coating. Starting with a grit that's too fine usually means spending much more time removing the existing finish.
No. A higher grit number simply means the abrasive grains are smaller. Fine grits are intended for finish sanding, polishing, and preparing surfaces for coatings, while coarse grits are better suited for stripping finishes, removing rust, and reshaping wood or metal.
Using an extremely fine grit at the beginning of a project can slow your progress because it removes very little material with each pass. Select the grit that matches the amount of stock you need to remove and the finish you're working toward.
Some sandpaper products work well on both wood and metal, but the abrasive mineral should match the application whenever possible.
Selecting the proper abrasive helps improve cutting speed and can reduce premature wear.


EdgeCore Ceramic Sanding Belts

EdgeCore Ceramic Flap Discs
Buffing Kit