Your Cart is Empty


How To Remove Rust From Metal

Quick Overview
Rust, the result of the oxidation process on metal, not only mars its appearance but also weakens it. Effective rust removal is crucial to ensure the durability, functionality, and aesthetics of metal items. Various methods may be used, including mechanical means like manual sanding or using power tools and chemical methods with commercial removers or DIY solutions. After rust removal, smoothing the surface with fine-grit abrasives and applying primer and paint can protect the metal from future rust.
Unfortunately, many types of metal can rust over time, resulting in flaky, orange spots. This isn't just about looks, however - rust can also weaken the metal, making it less sturdy and shortening its working life. It doesn't matter if we’re talking about tools, car parts, or outdoor furniture - once rust sets in, it can ruin almost any metal item, affecting its appearance and functionality.
Getting rid of rust is important to make sure your metal items last longer, perform better and keep their shine. Removing rust can also prevent further damage and restore the item's original appearance. All you need are the right removal strategies and some tips for getting the best results with each one.
At Red Label Abrasives, we offer a variety of high-quality abrasives that make rust removal easier and more efficient. Whether you're tackling a small project at home or dealing with larger industrial items, our products are designed to help you get the job done right. In this blog, we’ll show you how to use abrasives (as well as other products) to restore your metal objects to prime condition.
Understanding Rust
Rust occurs when metal meets moisture and air and oxidation occurs. This reaction forms iron oxide, or what we commonly see as rust. Rust not only changes the color of the metal to an orange or brown but also makes it weaker.
Several factors speed up the rusting process. Moisture is a big one – water from rain, humidity in the air, or even just a spill can start the oxidation process. Salt makes it even worse, which is why metal items near the ocean or in areas where roads are salted in the winter rust more easily. The presence of acids or industrial chemicals in the environment can also lead to more rust.
Not all metals rust the same way. Iron and steel are the most likely to get rusty. This is because their makeup reacts more with water and oxygen. Other metals, like aluminum and stainless steel, have a protective layer that forms naturally, helping them resist rust better. However, even these metals can corrode under certain conditions, though it might not look like the traditional orange rust we see on iron and steel.
Tools and Materials Needed
Before starting any rust removal project, it's important to have the right tools and materials on hand. Below is an overview of what you'll need.
Abrasives
- Sanding sheets:Great for hand sanding small areas with light rust.
- Sanding Belts: Used with belt sanders for more extensive rust removal on larger flat surfaces. Sanding belts may also be useful for sanding pipes with a tube belt sander.
- Sanding Discs: Perfect for use with power sanders to quickly remove rust from metal objects.
Protective Gear
- Gloves
- Masks
- Goggles
Chemical Rust Removers and Natural Alternatives
- Chemical Rust Removers:These products are formulated to dissolve rust quickly. Follow the instructions carefully and use protective gear.
- Natural Alternatives:For a more eco-friendly option, white vinegar, lemon juice, and baking soda can also help remove rust. They're safer to use but might take longer to work.
Cleaning Supplies
- Brushes:A stiff wire brush can help you scrub off loose rust before and after applying removers.
- Cloths: Soft cloths are useful for applying natural removers and for cleaning and drying the metal surface after rust removal.
Preparing the Metal Surface
Before rust can be removed from any metal object, the surface must be properly prepared. This ensures that the removal process is as effective as possible. Here are the steps involved:
- Clean the Surface:Begin by wiping down the metal with a clean cloth to remove any loose dirt or debris. This initial cleaning helps you see the rust more clearly and determine the best removal method.
- Wash with Soap and Water: Use a mild soap and warm water to thoroughly clean the metal surface. This step helps to remove any grease, oil, or other substances that might prevent rust removers from working well. A sponge or a soft brush can be helpful for scrubbing without scratching the metal.
- Dry Completely: After washing, dry the metal item thoroughly with a clean cloth or towel. Any remaining moisture could lead to more rust, especially if you're not planning to remove the rust immediately after cleaning.
- Use a Degreaser (if needed): If the metal is particularly greasy or if you notice that soap and water weren't enough to remove all the oil, you might need to use a degreaser. Apply it according to the instructions, and then wash and dry the metal again.
Cleaning the metal surface before tackling rust is essential. Dirt, grease, and other contaminants can act as barriers, making it harder for both mechanical and chemical rust removers to do their job. Plus, cleaning helps you avoid pushing contaminants deeper into the metal, which could cause more problems down the line.
Rust Removal Methods
Removing rust from metal can be done in several ways. You can use physical effort, some power tools, and/or chemical solutions.
Mechanical Methods
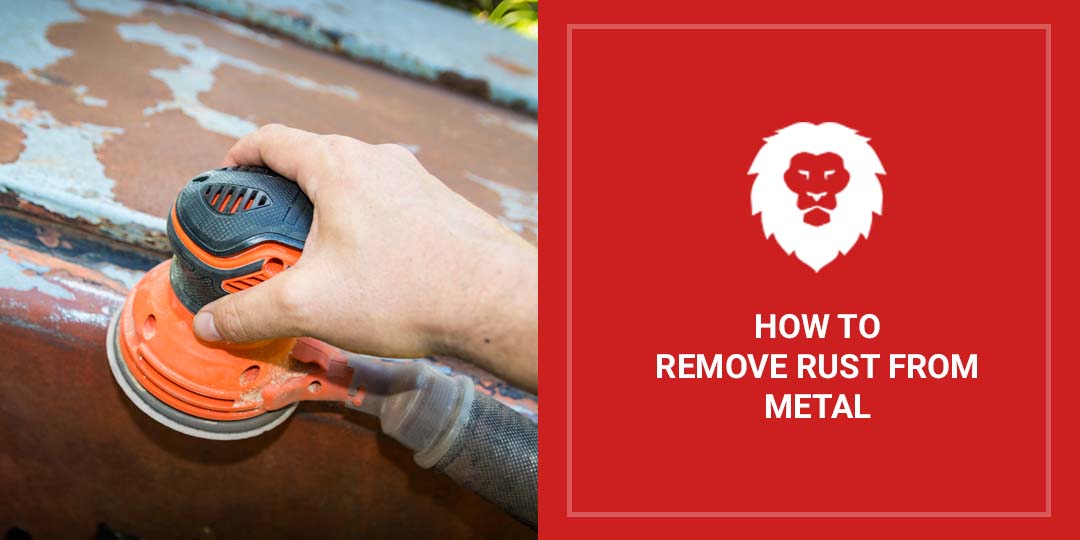
For light to moderate rust, you can use sanding sheets or abrasive pads. It's a simple method where you rub the rusty surface until you reach clean metal. For larger surfaces or tougher rust, power tools like electric sanders or drills with brush attachments can save time and effort. These tools make it easier to remove rust by doing most of the hard work for you. Just be sure to wear safety gear, like gloves and goggles, to protect yourself from flying debris.
For very heavy rust or industrial projects, abrasive blasting (like sandblasting) is the way to go. This method uses high-pressure air to blast abrasive materials at the rusty surface, stripping away rust quickly. It's powerful but should be used with caution and, ideally, by those with experience.
Abrasive Grits for Rust Removal
The grit you choose can make a big difference in how well you can get rid of rust and prepare the metal surface for finishing.
- Coarse Grits (40-80 Grit):Coarse grit abrasives can quickly strip rust and old paint off metal surfaces. However, because they're so aggressive, they can leave scratches on the metal. It's best to use coarse grits for the initial rust removal stage, especially on surfaces where a smooth finish isn't critical, or if you plan to follow up with finer grits to smooth things out.
- Medium Grits (100-150 Grit): Once the heavy rust is removed, or if you're dealing with moderate rust, medium grit abrasives are the next step. They're less harsh than coarse grits, making them ideal for preparing the metal for finishing. Medium grits can remove smaller rust patches and smooth out the scratches left by coarser abrasives, leaving a more uniform surface.
- Fine Grits (180-220 Grit) and Very Fine Grits (240+ Grit): For finishing touches or dealing with light rust, fine and very fine grits do the job. These abrasives are gentle on the metal, polishing the surface to a smooth finish. After removing rust with coarser grits, switching to fine or very fine grits can prepare the metal for painting or sealing. They're also great for giving metal a nice, clean look if you're not planning to paint it.
Types of Abrasive Grains for Rust Removal
Different abrasive grains work better for specific tasks and types of metal. Here’s a look at grains commonly used for rust removal:
- Aluminum Oxide:Aluminum oxide is tough and durable, making it great for grinding, sanding, and removing rust from a wide range of metal types. It's especially good for iron, steel, and other ferrous metals.
- Zirconia: Zirconia is another hard and sharp abrasive material. It's even tougher than aluminum oxide and works well on harder metals and surfaces that need a more aggressive approach. Zirconia is excellent for removing heavier rust or for preparing surfaces that are extremely rough.
- Ceramic: Ceramic abrasives are extremely durable and maintain their cutting edge well. They're ideal for heavy-duty rust removal tasks and can be used on a variety of metals. Ceramic abrasives are particularly effective for quickly removing large amounts of rust, and they last longer than many other types of abrasives, making them a cost-effective choice for bigger projects.
Chemical Methods
Chemical rust removers can dissolve rust without the need for physical scrubbing. When choosing a chemical remover, look for one that's suitable for your metal type and level of rust buildup. Always follow the product's instructions and use gloves and a mask to protect yourself from harmful fumes.
DIY Natural Rust Removal Solutions
For an eco-friendly option, household items like vinegar, baking soda, or lemon juice can be effective against rust. For example, soaking small items in vinegar overnight can loosen rust, which you can then scrub off. A paste made of baking soda and water can be applied to rust spots and scrubbed off after some time. These methods are safer and more environmentally friendly but may require more time and elbow grease to work.
Whether you choose mechanical methods or chemical solutions, the right approach depends on the size of the item, the extent of the rust, and your personal preferences. Some situations might even benefit from a combination of methods to get the best results. Always start with the least invasive method to protect the integrity of the metal as much as possible.
Finishing Touches
After you've removed the rust from your metal item, it's not quite time to call it a day. Getting your metal looking good and protecting it from further rusting is the next step.
Smoothing Out the Metal Surface
Once the rust is gone, you might notice the surface is a bit rough. To smooth it out, use fine-grit sanding sheets or an abrasive pad. Start with a medium grit if needed, and then move to a finer grit for that perfect finish.
Priming and Painting Metal
To keep rust from returning, it's smart to cover your metal with a protective layer. First, apply a primer designed for metal. The primer acts as a protective coat that also helps the paint stick better. Make sure the primer is completely dry before moving on to painting.
When choosing paint, pick one that's meant for metal and suitable for the environment in which the item will be used and stored. Apply the paint in thin, even layers, letting it dry fully between coats. This not only makes the metal look great but also seals it off from air and moisture, which are the main culprits behind rust.
Maintenance Tips to Prevent Rust
Keeping your metal items free from rust involves regular care and attention. By following these maintenance tips, you can help prevent the problem from coming back or even starting in the first place.
Regular Cleaning and Inspection:
Make it a habit to clean and inspect your metal objects regularly. Wipe them down with a clean cloth to remove dirt and moisture. Pay special attention to any cracks or joints where moisture could hide. This regular check-up can catch rust early and make it easier to deal with.
Protective Coatings and Treatments
Applying a protective coating or treatment can significantly reduce the risk of rust. Options include rust-inhibiting spray paint, oil, or a silicone-based spray. These coatings create a barrier that moisture and oxygen can't penetrate, keeping your metal safe. Reapply these treatments as recommended or anytime you notice wear and tear.
Environmental Considerations
Your storage environment can make a big difference in preventing rust. Try to keep metal objects in a dry, well-ventilated area. If you're dealing with high humidity, consider using a dehumidifier to keep the air dry. For outdoor items, make sure they're covered or stored away when not in use, especially during rainy or snowy seasons.
Proper storage also means avoiding direct contact with the ground, which can transfer moisture to your metal objects. Use shelves or hooks to keep items off the floor and away from potential water damage.
Red Label Abrasives Provide Swift and Efficient Rust Removal
Rust can really take a toll on metal items, making them weaker and less attractive. Taking the time to remove rust and keep your metal belongings in good shape is key to ensuring they last longer and perform better.
For those looking to get the job done right, Red Label Abrasives offers a range of high-quality sanding belts, sanding discs, flap discs, and other abrasive products. Whether you're dealing with a small rust spot on a tool or tackling larger industrial projects, our abrasives are designed to help you remove rust efficiently and with great results. If you have questions or would like to place an order, please contact us by calling 844-824-1956 or filling out our contact form today.


Our Most Popular Abrasives

EdgeCore Ceramic Sanding Belts

EdgeCore Ceramic Flap Discs

Buffing Kit
Shop By Product Category


Why Choose Red Label?

